The perfect quick-to-make meal for Football Sunday or any other day. Most everyone has these simple ingredients in their everyday pantry.
Ingredients:
2 lbs ground venison
6 cups of diced (3/8 inch) white potatoes
2 cups diced sweet white onion
2 cups sliced celery
2 cups sliced carrots
2 TBS minced garlic
1 TBS table salt
1 TBS black pepper
1 TBS basil
3 TBS salted butter
Two 15 oz cans of black beans
One 15 oz can of cannoli beans
One 15 oz can of sweet corn
One (1) 28 oz can of crushed tomatoes
One (1) 28 oz can of plum tomatoes
One (1) 24 oz can of spaghetti sauce
16 oz box of Rotini noodles
Cooking Instructions: Add the potatoes, carrots, celery, 1 cup of diced onion and 1 TBS minced garlic to a 2-gallon cooking pot. Add enough water to cover the mix by 2 inches or so. Add 2 TBS of butter, salt, pepper, and bring to a boil. Set to simmer for about 30 minutes or until potatoes and carrots are soft.
In a large fry pan, add the burger, 1 cup of onion, 1 TBS butter, 1 TBS garlic, a dash of salt and pepper, and about 3-4 TBS of water, and cover. Cook to a gentle steaming simmer until the burger is browned. Add the burger to the potato cooking pot.
Now add the tomatoes and sauce, cover. After reaching a gentle boil, add the black beans, cannoli beans, sweet corn and Rotini noodles. Bring back to a slow simmer for about 30 minutes, or until the noodles are cooked and expanded. If not, simmer a bit longer. The noodles absorb the watery flavored liquids and add gentle chewy stock to the gumbo.
Serve: Spoon it out to a large coffee cup or soup bowl. Add a slice or buttered bread or a sliced roll.
For outdoor folks who fish and hunt, it’s time to check the freezer. Ground venison, elk or venison backstraps, pheasant breasts, rabbit legs, squirrel tenders, wild duck, goose, wild hog, walleye fillets and vacuum-packed steelhead. So many choices. And the best part? They’re all healthy. Many of us in Western New York and across the USA had fleeting thoughts that this rebuilding year for the Buffalo Bills was never going to get us so close to the big game in New Orleans, and for black-and-white reasons, it was easy for some to see, there is next year. In the meantime, most folks cannot miss watching the game. No matter the teams, the fun of the laughs with the million-dollar commercials and the goodness of tasty snacks keeps us in tune with the moment.
Now, we’re not talking about roasting rattlesnake tails, but a good supply of CWD-free whitetail deer, deep-water Lake Erie walleye, cold-stream steelhead, and lots of rabbits, squirrels, ducks and geese for a myriad of tasty concoctions. Cooking wild game not only provides a unique culinary experience but also offers nutritional benefits. These meats are lean, high in protein, and often free from the additives found in store-bought meats, making them a healthy and delicious choice.
Last Christmas, my nephew surprised me with a hardcover copy of a book entitled The MeatEater Outdoor Cookbook (MeatEater is one word). At my silver-haired, try-to-act-young age, with social security income as my best friend, I’ve been cooking wild game for a very long time. One flip through the pages made me want to read more. The pictures are scrumptiously inviting, and the recipes are appealing with their short list of simple ingredients and directions to understand and do.
There is nothing like easy-to-do stew and chili using a wild critter that you took from the field.
There are recipes derived by top chefs from across the world that teach readers how to make a variety of incredibly delicious meals and snacks. Some of the recipes include venison dumplings, Bison Big Mac tacos, blackened fish with sweet potato fries, barbequed goose thighs, mushroom-rubbed roast venison au-jus, duck with spicy cold noodles, rabbit cacciatore, popcorn fish (walleye or crappie), wild turkey curry sandwich, rendezvous stew, herb-marinated pheasant skewers, beer battered smelt tacos, ginger catfish stir-fry, and the winning recipe for MeatEater’s chili cook-off. Each recipe comes with a difficulty level and estimated cooking time, making it easier for you to plan your meals. Those are just a few of the choices. The point is that this book is full of tasty choices, but you can also find the recipes for free online.
The MeatEater is a non-fiction outdoor television series that features hunting, fishing and fun outdoor adventures. The show runs in the United States on Netflix, and the star is host Steve Rinella. Rinella is an outdoorsman, writer, and wild foods enthusiast who is a passionate advocate for conservation and the protection of public lands. He is also the host of the “Hunting Story” on the History Channel. Rinella lives in Bozeman, Montana, with his wife and three kids, and he helps us all to better understand the wilds, especially the importance of hunting. And now, the simplicity of preparing wild game foods for such moments just in time for the Super Bowl. Visit https://www.themeateater.com and click on recipes.
This recipe produces a moist and tender breast that’s absolutely scrumptious.
By Karen Lutto
With spring turkey hunting season kicking into high gear all around the country, successful gobbler getters looking for a delicious new way to prepare their turkey breast should try this Stuffed Smoked Turkey Breast recipe from Hi Mountain Seasonings. It’s easy.
“A lean wild turkey breast can be difficult to prepare without it coming out on the dry side,” said outdoor writer Bob Robb, an accomplished turkey hunter. “That’s why they’re often turned into fried turkey nuggets. This creative recipe from Hi Mountain Seasonings is a game-changer. It produces a moist and tender breast that’s absolutely scrumptious. It’s easy and sure to please family and friends.”
The recipe is centered around two popular Hi Mountain Seasonings products – the Hi Mountain Seasonings Game Bird and Poultry Brine Kit and Hi Mountain Seasonings Rib Rub. The Game Bird and Poultry Brine Kit is a mixture of salt, sugar, brown sugar, sodium nitrite (.85%), maple syrup, caramel color, and less than 2 percent glycerin added to prevent caking. Each brine package contains two packets of the mix, which make one gallon of brine, for a total of two gallons of brine (two brine bags are included), and easy-to-follow instructions. It has a suggested retail price of $9.99. Hi Mountain Seasonings Rib Rub features a blend of paprika, dehydrated garlic, salt, dehydrated onion, honey granules (refinery syrup, honey), black pepper, mustard, silicon dioxide (for anti-caking), cayenne pepper, and soybean oil (refined to be allergen free). It comes in a 10 oz. bottle, with a suggested retail price of $10.99.
Stuffed Smoked Wild Turkey Breast Ingredients:
2 skinless wild turkey breasts
1 packet Hi Mountain Seasonings Game Bird and Poultry Brine Kit
Hi Mountain Seasonings Rib Rub
1 apple, peeled and cubed
1 onion, peeled and cubed
4 tbsp butter in four 1-tbsp slices
Olive oil
Directions:
Brining: In a non-metallic bowl, mix one pouch of Hi Mountain Seasonings Game Bird and Poultry Brine with one gallon of water. Add six cups of ice to the brine. Place the brine bag in a large pot and add the turkey breasts, breast side down, to the brining bag. Pour the brine mixture over the turkey, then place the turkey breasts in the refrigerator to brine for 24 hours.
Roasting: Remove the turkey breasts from the brining bag, rinse under cold, running water, then pat dry with paper towels. Air dry the turkey breasts for at least 30 minutes.
While the turkey breasts are air-drying, cube the peeled apple and onion. Lay the turkey breast flat on a cutting board. With a sharp knife held parallel to the board, cut a pocket into the turkey breast, leaving a section uncut – like a hinge – on the thicker side of the breast. Stuff half of the cubed apple and onion inside the pocket of the first turkey breast and season the mixture with Hi Mountain Seasonings Rib Rub.
Place two 1-tbsp slices of butter on top of the apple/onion cubes inside the turkey breast pocket. Fold the turkey breast over to seal the pocket. Brush both sides of the turkey breast with olive oil, then season all sides of the turkey breast with Hi Mountain Seasonings Rib Rub.
Repeat with the second turkey breast.
Preheat a wood pellet grill that has a smoke/grill option to 200 degrees. Smoke the turkey breasts for 30 minutes. After 30 minutes of smoking, increase the heat to 350 degrees and continue grilling until the turkey reaches an internal temperature of 165 degrees. Remove the turkey breasts from the grill and let them rest for 20 minutes before slicing and serving.
Please note: A meat thermometer is an essential tool for this recipe.
This mouth-watering recipe is just one of the many free recipes found on the Hi Mountain Seasonings website, www.himtnjerky.com. HMS is America’s premier manufacturer of kits for homemade jerky and sausage, Western-style seasonings, bacon cures, snackin’ stick kits, dressings & dips, delicious recipes for meat, fish and fowl, and much, much more. Why not check it out today?
More about Hi Mountain Seasonings: Located in the heart of Wyoming, Hi Mountain Seasonings was founded in 1991 and is America’s premier manufacturer of homemade jerky and sausage kits. Hi Mountain Seasonings has successfully captured distinct, traditional Western flavors in its jerky cure & seasonings, Western-style seasonings, bacon cures, snackin’ stick kits, dressings & dips, and much, much more. The company also offers field dressing and prep and cooking tools. For additional information, write Hi Mountain Seasonings, 1000 College View Drive, Riverton, WY 82501; call toll-free 1-800-829-2285; or visit the company website at www.himtnjerky.com.
After refrigerating for 7 days, remove the wild turkey from the brine and rinse thoroughly. Soak the wild turkey in a water bath for two hours, changing the water once during this process. Remove the wild turkey from the water bath and dry it with a paper towel.
Place the wild turkey on a rack to air dry for one hour.
In a small bowl, mix the Hi Mountain Seasonings Garlic Rub and coriander. Liberally coat all sides of the wild turkey with this mixture.
Set the smoker or pellet grill to 200 degrees F and place the wild turkey in it. Once the turkey’s internal temperature reaches 165 degrees F, remove it from the smoker.
Place the wild turkey on a large piece of tin foil. Pour the beef stock on top of the wild turkey and seal the foil tightly around the wild turkey.
Place the wild turkey back into the smoker and steam for another 30 minutes.
Remove foil-wrapped wild turkey from the smoker and carefully take the roast out of the foil.
Let the wild turkey pastrami rest for 20 minutes before slicing and serving.
Note: Use a meat thermometer to make sure the internal cooking temperature has reached 165 degrees F.
We sincerely hope that you and your families are well and that you have enjoyed this unusual Easter weekend more than expected. Yesterday, here in Western New York, it was a gorgeous spring day. As you can see, the daffodils at the end of the vineyard rows are celebrating.
A PERFECT PAIRING – The Dry Rose of Pinot Noir is delicious with Reverie Creamery’s Black Garlic Chèvre (made with locally-grown and produced black garlic from Ramm Garlic Farm) and home-made bread. Yes, this pairing celebrates our “sense of place” with both wine and cheese from Chautauqua County. Reverie Creamery is a small batch artisanal cheesemaker on the west shore of Chautauqua Lake – it is open (SEE website for their hours) and can provide pre-order curbside delivery.
We appreciate, with gratitude, all of the interest and support we are receiving from our customers. Thank you for serving our wines at your tables.
Going forward, we can send periodic updates of activities on the farm (pruning is finished and trellis repairs have begun) and in the winery (secondary in-bottle fermentation has been started for the Sparkling Traminette and our new estate-grown Chardonnay-Pinot Noir Cuveé!) – for neither the vines nor the wines in the tanks understand that there is a pandemic.
We are confident that by the time these sparkling wines are ready to be released that we will be free to enjoy them together.
Need a fresh taste of Spring?
Dry Rose of Pinot Noir
Traditional “French provençal” rosé – perfect with dinner, especially when served not-too-cold. She doesn’t usually pour a second glass, but Jennifer did with this one!
Ruby Dry Rosé Made from Maréchal Foch grapes and bursting with fruity flavors. Don’t tell anyone, but Jennifer said that this wine is the first one that ever made her think of the word “gulp”!
Warm Spring Regards,
Jennifer & Fred Johnson, Johnson ESTATE Winery
To receive our emails to your inbox, please add this email address to your contact list – admin@johnsonwinery.com – as some email providers may divert our emails into your spam folder.
Can also be prepared on the grill, simply use heavy-duty aluminum foil instead of the baking dish
We like this healthy, delicious dinner meal with a dinner salad and a small portion of carbohydrates, like cooked noodles, brown rice or a sliced red potato. Add a squeeze of your favorite tropical fruit as an option, like this sweet Florida juice orange from Lee County, Fl. Undescribable deliciousness!
By Fern Fisher
Ingredients:
Pam spray or Olive Oil
Hellman’s real mayonnaise
1 large salmon fillet (you can use any fish fillet)
1 sweet white onion
½ tsp ea of ground thyme, garlic powder, paprika, cayenne pepper and salt
¼ cup bread crumbs
Aluminum Foil
Pinch of Black Pepper
1 fresh orange, lime or lemon
Source of 375F heat (grill ofr oven)
When we met with winter friends in Fort Myers, Florida – after their return from a trip to an Alaskan island in the middle of salmon season, they honored our get-together with a few vacuum-packed frozen silver salmon fillets. It was a mouth-watering trip all the way back to our kitchen, just thinking about this special-gift dinner! This recipe is so simple and so delicious. Try it!
Spray middle area of a baking dish of size to hold the fillet with olive oil or Pam. Place the fish fillet skin side down in the baking dish and spread a thin coating Hellman’s mayo to the top of the fillet.
Slice the onion thin and place several pieces across the fish on top of the mayo.
Dry mix the ground thyme, garlic powder, paprika, cayenne pepper and salt with the bread crumbs and lightly disperse over the fillet.
Once the mayo, onions, and seasonings are in place, cover the baking dish with aluminum foiland place into the oven set at 375 for 35-40 minutes.
Preheat the oven to 375 and cover the baking dish with aluminum foil.
Place the fish into the oven for 35-40 minutes, or until the fish fillet turns white. Remove from the oven, use a spatula to cut into portion size pieces and serve the fish. At your option, squeeze the juice of an orange, lime or lemon, your personal preference, over the fillet portion on your plate.
We like this healthy and delicious dinner meal with a small dinner salad and a small portion of carbohydrates like cooked noodles, brown rice or sliced red potato.
Cover with water so that beans, ham, and veggies are completely submerged. Bring to a rolling boil. Reduce heat to a simmer. Simmer for an hour and a half on low heat.
Remove bone and shred ham.
Add potatoes and hard-boiled egg (whites only) and simmer for another half-hour to one hour, until potatoes are tender.
Serve up. Makes Plenty.
Add a splash of cider vinegar if desired.
Enjoy!
About Tyler Frantz: Tyler is President of the Pennsylvania Outdoor Writers Association, and authors several outdoor columns. He wears many hats as a teacher, writer, coach, family man, outdoorsman, and Christian. Tyler says, “Life’s a true blessing,” and offers a refreshing, working man’s perspective towards freelance outdoor writing and videography. He regularly provides a variety of how-to outdoor pieces and special interest features on outdoor issues. No matter what the topic, his award-winning work never ceases to entertain and enlighten. Feel free to his visit website and blog for great videos, articles, and interactive opportunities: Natural Pursuit Outdoors.
This recipe makes plenty! Get the freezer containers.
Burger, steaks, roasts, stew meat, and ribs are all fine and dandy, maybe you want more
It’s easy to put breakfast sausage, summer sausage, jerky, and other novelties in the freezer
What to do, where to buy supplies, how to process your game meat
Forget about the “gamey” taste of a big buck with these simple alternatives to regular cuts of meat. Photo: Eastman Outdoors
By Jason Houser
As hunters, we don’t have to hunt for the need to put food on the table like our ancestors once did. Today, we hunt for the joy of being outdoors, the thrill of the hunt, making memories, and much more. The food on the table is a bonus, a great gift, that many hunters look forward to for 12 months out of the year.
Many hunters like to process their own wild game. I fall into that category, enjoying the accomplishment of completing the process of taking the meat from the field to the table. It can get messy and take some time, but the payoff is worth it.
Too many hunters are not taking advantage of all the possibilities when it comes to processing their game. Sure, the old standbys like the burger, steaks, roasts, stew meat, and ribs are all fine and dandy, but you don’t have to stop there.
What if you could put breakfast sausage, summer sausage, jerky, and other novelties in the freezer? These foods are just as good, if not better than what a meat processor could do for you, or what you could purchase at the store. And, if you’re concerned with the “gamey” taste associated with a big buck, these simple foods take any strong-taste worry away.
These sausage novelty projects are straightforward and simple, and chances are the recipe will call for ground burger meat. Or, maybe you have an abundance of old ground meat in your freezer and are looking for some alternative uses. With added seasonings and possibly having to adjust the amount of fat to the burger mix, you will be well on your way to enjoy some excellent alternatives to the old standbys most of us are accustomed to with game meat.
Summer sausage is a favorite for many hunters.
Often, much of the food like brats, hot dogs, summer sausage, and other items, will require a sausage stuffer. Sausage stuffers can be purchased separately from your grinder, but most of today’s meat grinders come with the equipment needed to double as a sausage stuffer. If you don’t have a sausage stuffer, a manual hand crank stuffer will suffice for home use. The #10 meat grinder from Eastman Outdoors is equipped with everything you need to grind the meat as well as all your stuffing needs.
I have tried a couple of different sausage and jerky brands, but my brand of choice is Eastman Outdoors. Not to say the others are not good, but Eastman Outdoors has an enormous assortment to choose from, tastes excellent, and their supplies are user-friendly.
If you choose to make meat sticks, brats, summer sausage and other foods that require casings, make sure you purchase the correct type and size of casings for the recipe you are following. Casings come in several sizes and materials. For example, collagen casings are edible and are often used for hot dogs and brats. Fibrous casings, on the other hand, are not edible. These types of casings are used for foods like bologna, summer sausage and pepperoni. Double-check what you are purchasing to make sure it will work for the project you are doing.
A manual stuffer is much cheaper than an electric stuffer. Photo: Eastman Outdoors
When you use a grinder/sausage stuffer, there are some things you should know before you begin to make the process go smoothly.
Place the metal parts into the freezer ahead of time: plates, knife, head, auger, and tray. When the parts are cold, they will do a better job grinding the meat. The same with the meat. Keep it as cold as possible without freezing. Try to not touch the meat except when needed. Your hands put off heat.
Many recipes are going to call for an 80/20, 85/15, or 90/10 blend of meat/fat. To do this, you’ll need some help from another source, as your particular cut of meat may be too lean. Purchase beef or pork fat from your local butcher and keep it frozen until you’re ready to grind.
As soon as the meat begins to slow, or come out mushy, stop grinding and remove the sinew build-up from the knife and auger. Then, replace your newly cleaned auger, knife, and plate. The buildup will cause the meat to warm— and warm meat is never a good thing.
Making delicious foods from home with just a grinder, sausage stuffer and the ready-to-use kits for specialty food-making is a breeze.
Stop eating the same old deer meat and get creative this season. You’ll be glad you did.
This chili recipe does not call for many ingredients and is delicious.
By Jason and Lotti Houser
This easy Venison Chili recipe is hearty and delicious, perfect for the cold months of hunting season, or any time you have ground venison in your freezer.
I grew up on venison. If you lived in a family of hunters, you probably did too.
When properly butchered, you end up with a lot of meat and eat it in everything from goulash to tacos to spaghetti to burgers and chili.
If you are reading this, you are probably a hunter or know someone who hunts. If that is the case, you probably have a freezer full of venison and are always on the lookout for new recipes.
A lot of hunters have their meat “processed” by a local butcher and you get back neat little packages of ground venison, venison steak, venison tenderloin, venison sausage, stuff like that. Hopefully, it is the same deer you dropped off and you hope it was properly handled. But in my house, we do it ourselves, ensuring we get as much meat to the freezer as possible, insuring that it is handled properly.
Allow the venison, onion, and pepper to cook until the meat is brown, and the vegetables are tender.
Below, this recipe is a favorite in our home. In just a few easy steps, you will have a hearty chili cooking up with great taste. You can go do other things or relax until it is time to eat. If you like, this can be cooked on the stovetop at low heat until ready to serve.
Chili is best cooked over low heat for a longer period of time to allow all the flavors to mix. Otherwise, it can be cooked over high heat if you are in a hurry. Once the meat is browned and everything is mixed, all that has to be done is to warm it up and enjoy it.
Chili is a hearty dish on these cold winter nights.
Ingredients:
1-pound ground venison
2 Tablespoons olive oil
Chili powder, to taste (0 – 1 Tbs or more)
1 medium onion, chopped
1 green bell pepper, chopped
2 cloves garlic, minced
3 cans, 15-ounce, chili beans, drained
1 can, 28-ounce, diced tomatoes, undrained
1 can tomato juice, 46-ounce
Diced onions, shredded cheddar cheese, scallions and sour cream for garnish (optional)
Directions:
Add ground venison, olive oil, chili powder, onion, green pepper to skillet. Cook until meat is brown, and vegetables are tender, adding the garlic during the last minute of browning. Transfer the meat mixture to a crockpot. Add the remaining ingredients and stir to combine all ingredients. Cook on high heat for 4 hours or low heat for 8 hours. Garnish as desired.
Bluefish is a popular saltwater game fish found in tropical and subtropical waters around the world. In the United States, they are found from the Florida Coast to Massachusetts, and also in the Gulf of Mexico. Bluefish are caught in great quantities, and when cooked up fresh, they are delicious. But what do you do with all the extra bluefish or the bluefish that is in the freezer? That is easy to answer—make mouthwatering, flavorful smoked fish with a proven recipe using proven brine recipe with proven seasonings.
Bluefish are known to be very oily with a fishy taste, which some people don’t enjoy. The nasty taste is compounded when they are frozen. To overcome that fishy flavor, simply brine the fish in one of the delicious Hi Mountain Seasonings and easy-to-use fish brines – flavors include: Alaska Salmon, Wild River Trout or Gourmet Fish (you can use any of the brines, don’t let the names fool you, they are all-purpose.) The brining process helps to remove the oily flavor and infuses moisture which is needed for the next step in this recipe, which is smoking.
So before you toss those frozen fish, make some palate-pleasing treats with your smoker for everyone to enjoy. Serve them plain or with your favorite dipping sauce.
Hi Mountain’s entire line of products, cooking tips, instructional videos and recipes are also available at www.himtnjerky.com. Hi Mountain products also can be found at high-end sporting-goods stores, farm-and-ranch stores, and many local grocery stores.
Located in the heart of Wyoming, Hi Mountain Seasonings Company was founded in 1991. Hi Mountain is the premier manufacturer of kits for homemade jerky and sausage and has successfully captured distinct, traditional Western flavors in its jerky cure & seasonings, Western-style seasonings, bacon cures and other products that make up the unique line of gourmet Western seasonings.
For additional information, write Hi Mountain Seasonings, 1000 College View Drive, Riverton, WY 82501; call toll-free 1-800-829-2285; or visit the company website at www.himtnjerky.com.
Smoked Bluefish Recipe:
4-5 lbs. of bluefish fillets
1 pouch of Hi Mountain Seasonings Gourmet Fish Brine
1 gallon of Ice Water
1 non-metallic container
HMS Gourmet Fish Seasoning*
HMS Trail Dust*
Pork Rub*
(*These can be substituted with any of the HMS seasonings you prefer. All of the rubs and seasonings are all-purpose seasonings.)
Directions:
Chill the fish in your frig before curing. Dissolve 1 pouch of brine in one gallon of ice water in a non-metallic container. Immerse the fish into the brine, making sure all the fillets are completely covered. Refrigerate for 24 hours.
After the curing process is complete, preheat your smoker to 180°. Remove fish from brine and rinse fillets with tap water. Pat dry with a paper towel. Spray a cooky rack with non-stick cooking spray and place the dried fillets on a rack and season with your selected choice of HMS seasonings.
Place the rack of seasoned fish into your smoker and turn the heat up to 200°. Smoke the fillets until they have an internal temperature between 155° and 165°. Remove the rack of fish from the smoker and let cool before serving.
Jim and Madonna Zumbo with the results of a very simple cooking solution that Jim is sharing with us.
ONLY Ingredients:
Olive Oil
Cavender’s Greek Seasoning
HOT GRILL
Presented by Forrest Fisher (photo credits: Jim Zumbo)
When Jim is not shoveling snow off the deck or fighting off the Wyoming wolves and grizzlies that want to partake in his cooking, he is sharing recipes with outdoor friends on-line. Here is one of those special, easy-to-do recipes in Jim’s own words.
“While hunting deer in Arkansas with a group of hunting writers, we were served backstrap by the ladies who cooked at the lodge. It was sensational. That’s where I learned this recipe. It’s so simple, you won’t believe it works.
The simple “Prep & Cook” process:
Trim the backstrap of all fat, then put it in a glass bowl or non-metallic bowl.
Drizzle the meat with Olive Oil. Flip it around so it’s well-coated.
Then sprinkle Cavender’s Greek Seasoning on all sides of the meat. Let it marinate for 4 to 6 hours before cooking.
Leave it on the counter for the first few hours, then put it in the fridge for the remainder of the time.
You’ll note that the olive oil will tend to jell a bit in the fridge.
Next step, put the backstraps on a hot grill.
When you put it on the grill, the olive oil will drip and cause the flame to flare up. Not to worry, it soon burns down, and will initially give a nice sear to the meat.
Important: Keep a meat thermometer handy. If you like it rare, remove it when the meat hits 140. At 150 to 155 it is well done. Cover it with foil for a few minutes. And that’s it. Be sure you eat it HOT — right off the grill.
There are many ways to cook backstrap. Before I learned this recipe, I sliced it into steaks or butterflied it and then cooked it. Never again.
I don’t know why this recipe works so well.
The meat has a terrific flavor and seems more tender.
Give it a shot and try it. I don’t think you’ll be disappointed.
Leftovers are sliced thin and used in delicious sandwiches.
Some background. I met one of the founders of the Cavender’s Greek Seasoning Company, Steve Cavender, at an Iowa Governor’s Deer Hunt hosted by the late, great, Tony Knight. Steve was from Harrison, Arkansas, and shared his seasoning with us. Tragically, he passed away far too soon, but the family continued the company. I didn’t know much about the seasoning and used it, among others, to flavor meals.
This is my go-to recipe for every backstrap I cook, 100% of the time. All it takes is olive oil and Cavender’s Greek Seasoning (which you can buy at Walmart). That’s important to know. It makes me crazy when I see a recipe with a rare ingredient that’s almost impossible to find.
Learn more about Jim Zumbo secrets of the wilds in Peterson Hunting Magazine, look for the closing back page article entitled, “Rear View.” Good stuff. Subscribe here: https://securesubs.osgimedia.com/orderpage_ex8.php?m=petersenshunting&pkey=IBQ1
This is the easiest, fastest, most tasty and quick recipe for delicious venison burgers.
Everyone that visits our humble abode says they love it, so I’m sharing it with you all. Please let me know what you think.
Hand-form the burgers, place on foil, to get ready to make a “foil bag” to place on grill.
Ingredients:
1 lb ground venison
½ lb lean ground beef
2 eggs (beaten)
1 cup Italian seasoned bread crumbs, adjust with the addition of water to mix for proper burger forming/consistency
1/2 cup finely chopped Vidalia onion
1 tsp salt
½ tsp pepper
4 tablespoons finely chopped garlic Hellman’s Mayonaisse
Red, yellow or green pepper – slice ¼ inch wide to place on top of burgers before cooking, as noted below
Combine all the ingredients by hand in a mixing bowl.
Mix ingredients.
Combine all the ingredients as noted above except for the pepper slices. Add ½ – 1 cup water to make mix pliable and to allow the ingredients to exchange flavor. Hand form 1/2 to 3/4 inch thick burger patties and set aside.
Cooking:
Place the burgers individually in aluminum foil. Lightly coat the area with olive oil where the burger will be placed. Add a thin layer of Hellman’s mayonnaise to the top of each burger, as shown, then add 2 strips of your sliced sweet pepper.
Then close up the aluminum foil making it a bag-like compartment, making the foil almost airtight. Leave one end slight open and add 2 oz of water to the bag. Close the open end and place the foiled burgers on the outdoor grill or in a 325-degree oven for about 15 minutes to 20 minutes (when the meat reaches 165F minimum).
Add a thin layer of Hellman’s Mayo, two slices of sweet pepper – your choice of variety, fold and form the top of bag and ends of the bag to form a pouch. Add a few ounces of water to one end of bag, place on a hot backyard grill. Done in 15-20 minutes. Soooo good.
The foil keeps the moisture in and allows the meat to cook in its own juices. It’s a mini-pressure cooker and cooks very fast. The water inside does not escape and so this helps to keep it from burning and over-cooking.
This is easy and using your backyard grill, you can cook 30 burgers for a small army or visitors group all at once in this manner. Other options include adding a full slice of onion and a sliced mushroom before sealing the foil.
Once cooked, add a leaf of lettuce, a slice of tomato, a slice of cheese and your favorite condiments.
Ultimate outdoor eating solution integrated into one package
By Bob Holzhei
Our four children, my wife and I, have camped throughout our lives. We started first with a 9 by 9 tent, then moved up to a pop-up camper, then a travel trailer, and finally we purchased a fifth wheel travel trailer with four slide outs. Thing is, maximizing space throughout the years was always a priority, after all, there’s no use packing things that may not get used. That is one reason why I wanted to share some of my experience with those of you just getting started. Where space and efficiency is important, products from GSI Outdoors have met the mission.
My compact 4-person outdoor cookware set includes a 3-liter pot, 2-liter pot, a 9-inch frypan and 2 straining lids. The Pinnacle Camper Set also includes four 14-ounce bowls, plates and mugs-complete with sip-it-lids to complete the package.
For my family, it’s our ultimate outdoor eating solution integrated into one package that easily fits into a backpack too. At under 4 pounds and a wonderful 9 by 9 by 6 compact size, the kids can go on side treks and weight and size are not a factor. I could not believe it either.
GSI Outdoors is in the business of making cookware and dining products that adapt the comforts of home to active outdoor lifestyles at the campsite, cabin and anywhere in between.
They continue to expand their designs, adding additional innovative lines of outdoor cookware, tableware and accessories. It works for us outdoor folks that share a passion to be outdoors and have the additional need “to be small and light.”
When well-built hardware brings people together in the outdoors, I thought you’d like to know about some of the best I have found. You can find their products in many outdoor outlets or go directly online to: https://gsioutdoors.com.
Click the picture for more recipes from Fresh Florida
“Fresh from Florida” recipes feature wild food (fish, game, garden vegetables, etc) prepared to taste delicious. Click picture for more recipes.
Ingredients
Kaitlin Goode and Chef Justin2 cups cooked Florida wild turkey meat, diced or shredded. Click Picture for video.
2 cups fresh Florida wild turkey meat, diced or shredded
1 ½ cups Florida green beans, cooked until tender crisp
1 ½ cups Florida sweet corn, cooked and cut off the cob
1 cups carrots, cooked 1 cup brown gravy (homemade or store bought)
2 cups mashed potatoes (homemade or store bought)
Sea salt and fresh ground pepper, to taste
Preparation
Preheat oven to 350 degrees and spray a baking dish with quick release spray. Beginning with the turkey and in a layering fashion, spoon each ingredient over the next, finishing with the mashed potatoes (the order of ingredients is discretionary except for the turkey and mashed potatoes). Bake 30 minutes until the mashed potatoes are golden brown. Serve warm.
Fresh From Florida FOOD FACT: Sheppard’s Pie traditionally uses lamb meat as the protein. When any other meat is used, it is referred to as Cottage Pie.
Each year that goes by, I search for recipes that are worth sharing because they meet the rules of “Easy-To-Make” and “Delicious-To-Eat.” Charlie Killmaster from Georgia has several great game recipes. Here is one of them and there are more at this site: https://georgiawildlife.blog/2018/12/12/oh-deer-7-venison-recipes-youve-gotta-try/.
Charlie Killmaster’s photo of his delicious Venison Reuben.
Ingredients:
Venison roast, preferably shoulder/neck, 1 to 3 lbs.
Thick-cut rye bread
Spicy brown mustard or Thousand Island dressing, your preference
1 tablespoon pickling spice
Morton’s Tender Quick, or your salt/sugar brine of choice
Sauerkraut
Swiss cheese
Crock pot
Charlie says, “I always prefer bone-in roasts from the front of the deer for this recipe. Start by making a brine using the directions on Morton’s Tender Quick or any other recipe for a salt and sugar brine. Make enough brine to totally submerge the meat and mix in the pickling spice. You can marinate anywhere from 1 to 5 days, but I find 3 days to be ideal before it gets to be too salty.
Whenever I’m processing a deer I harvested, I like to go ahead and brine 3 or 4 chunks of meat before I freeze it so I don’t have to wait on brining each time. Just thaw and cook when you’re ready. Next, rinse the meat and cook in a crock pot with plain water for about 8 hours. Shred the meat and assemble the sandwiches with the mustard or dressing, sauerkraut, cheese, and toasted bread.
To prevent a soggy sandwich, I like to heat up the sour kraut and squeeze with a paper towel to soak up excess moisture. Serve with fries or your favorite side dish and enjoy!”
What to get that special someone for Valentines Day? One answer is right here
Not sure what to get that special someone for Valentines Day? The answer is at your finger tips. Just type www.himtnjerky.com into your browser, and a plethora of fabulous gifts ideas will appear, making it hard to choose just one or two.
It’s time to step out of the chocolate box and add a little spice—or a lot of spice—to this Valentine’s Day with a gift your loved one will seriously love. The options are endless, from ready-made jerky, to jerky kits, to rubs, to shakers, to dips, to marinades to sausage kits. Hi Mountain Seasonings has something for everyone. You can order a great gift or gift basket that will be embraced, enjoyed and remembered for a long time.
Be bold this year, and add some spice to February 14th with a little help from your friends at Hi Mountain Seasonings.
Hi Mountain’s entire line of products, cooking tips, instructional videos and recipes are also available at www.himtnjerky.com. Hi Mountain products also can be found at high-end sporting-goods stores, farm-and-ranch stores and many local grocery stores.
Located in the heart of Wyoming, Hi Mountain Seasonings was founded in 1991. It is the premier manufacturer of kits for homemade jerky and sausage. Hi Mountain Seasonings has successfully captured distinct, traditional Western flavors in its jerky cure & seasonings, Western-style seasonings, bacon cures and other products that make up the unique line of gourmet Western seasonings. For additional information, write: Hi Mountain Seasonings, 1000 College View Drive, Riverton, WY 82501; call toll-free 1-800-829-2285; or visit the company website at www.himtnjerky.com.
Click the Photo above for a video recipe that is mouth-watering delicious!
Thanksgiving is a favorite holiday for all who cherish its traditions involving friends, family and food. Some love preparing dishes from recipes that have been passed down through the generations. Others enjoy experimenting with new flavors. An interesting culinary trend is using organic ingredients and serving wild turkey for Thanksgiving is a delicious, clean-eating option.
“Florida’s abundant wild turkey populations can provide the ultimate locally-sourced, organic Thanksgiving feast when knowledge, skill and good fortune come together for a successful hunt,” said Chef Justin Timineri, executive chef and culinary ambassador for Florida Department of Agriculture and Consumer Services. “We’ve developed several mouthwatering wild turkey recipes for the big day and ways to serve leftovers using a variety of Fresh from Florida products.”
Wild turkey cottage pie, scrumptious. Click the picture for the recipe.
Wild turkey is a tasty and versatile protein. Fresh from Florida chefs adapted several recipes to use wild turkey ranging from Tikka Masala, an Indian dish traditionally served with chicken, to wild turkey quesadillas and wild turkey cottage pie (a take on shepherd’s pie). Because wild turkey meat is low in fat, techniques for cooking them differ from domestic birds, and the Fresh from Florida chefs provide recipes and tips on how to prepare tender, juicy meals.
The Sunshine State is home to robust populations of two wild turkey subspecies: the eastern and the Osceola wild turkey. Florida is unique because the Osceola subspecies lives nowhere else in the world but on the state’s peninsula.
“Turkey hunting in Florida is a chance to experience the outdoors in a very special way,” said Roger Shields, wild turkey program coordinator for the Florida Fish and Wildlife Conservation Commission (FWC). “However, wild turkeys are extremely wary and possess sharp eyesight and excellent hearing so hunting them is a challenge.”
The FWC uses scientifically proven wildlife management strategies and professional expertise to meet conservation objectives and perpetuate sustainable turkey hunting opportunities. You can learn more about wild turkeys, including their behavior, habitat needs, and where they live in Florida at MyFWC.com.
Coat the bottom of a micro-wave baking dish with Pam, olive oil, coconut oil or your favorite oil.
Mix the following “crumb mixture” together in a small bowl: 2 melted TBS of margarine, 1/2 cup seasoned bread crumbs, chopped onion and garlic — 1/2 tsp each (or use garlic and onion powder instead of fresh), and 1 tsp. lemon juice.
Place ½ inch thick fish fillets in baking dish, flat side down.
Sprinkle crumb mixture on top of fillets.
Cover baking dish with plastic wrap or tight micro-wave cover. Do not turn over during cooking process. Microwave 6 to 7 minutes on high or until fish flakes (slightly longer if very thick fish pieces are used )
Add a twig of fresh parsley or two and serve with other dinner meal plans, cottage cheese or brown rice, fresh vegetable (beans, peas, etc.), any other favorites you like, such as hot sauce. Easy-Peasy and healthy!
Note: microwave cooking rate is usually about 6 minutes per 1/2 inch of fillet thickness. ENJOY!
Place ½ inch thick fish fillets in baking dish, flat side down.
Sprinkle crumb mixture on top of fillets.
Cover baking dish with plastic wrap or tight micro-wave cover. Do not turn over during cooking process. Microwave 6 to 7 minutes on high or until fish flakes (slightly longer if very thick fish pieces are used )
Remove from microwave, remove plastic-wrap, add a twig of fresh parsley or two. Serve with other dinner meal plans, cottage cheese or brown rice, fresh vegetable (beans, peas, etc.), any other favorites as you like.
Ingredients:
2 bottles (12 oz. each) medium-bodied ale (3 cups)
4 pounds red-skinned potatoes
8 slices thick-cut bacon
1/4 cup butter
1 small onion, chopped
1/2 teaspoon freshly ground black pepper
Salt
Directions:
1. Bring beer to a boil in a 5- to 6-qt. pot that can hold a steamer basket snugly. Meanwhile, cut potatoes into bite-size pieces and put them in a steamer basket. When beer boils, put steamer basket of potatoes in pot, cover, reduce heat to low, and steam until potatoes are tender when they are pierced with a fork (about 15 minutes).
2. Meanwhile, cook bacon in a frying pan over medium heat until crisp. Drain bacon on paper towels, chop, and set aside. Pour off fat in pan, but don’t wipe out or rinse. Return pan to medium heat and add butter and onions. Cook, stirring occasionally, until onions start to brown (about 10 minutes).
3. Meanwhile, put potatoes in a serving dish, reserving beer in bottom of pot. Add 3/4 cup beer and reserved bacon to onions, scraping up any browned bits from bottom of frying pan.
4. Pour bacon mixture over potatoes, add pepper, and stir gently to coat. Add salt to taste. Serve hot or warm.
Recipe is courtesy of Lake of the Woods Tourism:https://lakeofthewoodsmn.com/bacon-butter-potatoes/; Phone: 1-800-382-FISH (3474); Email: info@lakeofthewoodsmn.com.
Cast iron skillet on left, Dutch oven (lid behind) and deep skillet with glass lid (great for frying chicken). Rich Creason Photo
Many guys (and some of the ladies) enjoy outdoor cooking over hot coals. A steak cooked on the patio grill tastes excellent. Even at the campgrounds we travel to, most of the guests will have some type of grill for steaks or hamburgers. Some people even cook potatoes and corn on the grill. Of course, I’m different. My outdoor cooking is done over (and under!) hot coals. I do mine in a cast iron Dutch oven.
Dutch ovens were brought to this country when it was new. Cast iron skillets and other pots and pans were also used, but the oven is the most versatile. Nearly anything you can cook at home, on or in your stove, can be fixed in this cooking pot – from meat to pies and cakes.
A true Dutch oven will have three legs on the bottom so the container will be raised above the coals. It will have a flat lid on the inside which can be turned over to use as a griddle for frying eggs, pancakes, or meat, and have a flanged lid on the outside to hold hot coals on top. The lid will have a handle in the center which can be used for lifting (with the proper tool). The oven will also have a heavy wire bail for carrying when empty or full of delicious food.
My favorite is a 12-inch diameter Dutch oven made by Lodge Manufacturing Company (I have three of these). Other sizes are available if you have another preference. Lodge also has cast iron skillets, griddles, cornbread molds and accessories such as lid lifters, heavy gloves and more. These items may be purchased at many Mountain Man Rendezvous like the ones held at Friendship, Indiana, sporting goods outlets, or better hardware stores. Taken care of properly, your Lodge cast iron selection should last a lifetime.
Season your new oven by thoroughly washing it. Allow it to air dry. Next, coat the inside surfaces with a thin layer of salt-free cooking oil. Then heat up in your indoor oven or over an outside fire for about an hour over moderate heat. When done, again wipe the surface with oil. Keep the lid off except when cooking to prevent moisture condensation inside. After cooking, never clean with soap as it will fill the pores and get in the food next time. Use hot water and a soft plastic scrubber. Heat dry it. When cool again, reapply more oil. Never cool with cold water as it may crack or warp the metal.
Dutch ovens can be used for browning, frying, steaming, baking, deep-frying, and more. Stew is one of my favorite meals fixed in a Dutch oven. Meat chunks, potatoes, carrots, peas, corn, tomatoes, or whatever I have available, plus liquid made from two cups water and four bouillon cubes are what I use. I cook it for two to three hours. About thirty minutes before we eat, I cut up two cans of refrigerated biscuits on top of the stew, replace the lid, and get my plate ready. Wild game is excellent in it and some people even cook beef or other weird meats in it.
For dessert, I pour two cans of fruit pie filling in the bottom of another oven, cover with two boxes of white or yellow cake mix, then cut up two sticks of butter on top of that. No stirring of ingredients. The cobbler needs about twenty charcoal briquettes, (hot) below the pot and 15 on top. It should be done in 45 minutes. Many Dutch oven recipe books are available in the library or at stores which sell Lodge cookware.
Dutch ovens have been around for hundreds of years. There has to be a good reason why. Try one and find out for yourself.
New GSI Outdoor stoves can literally fit in your pocket and are good to go anywhere.
Usually with unexpected gunboat diplomacy, winter delivers nasty weather. Bone-chilling cold is predicted for the 2017 Christmas holiday period in many parts of the country, but don’t panic.
For outdoor folks, heading out on a hunting trip or planning to fish from a blind on the ice, it could still be great fun with the right gear. If you are a biker or hiker and live where the air is not so chilly, this outdoor gear story will also be helpful for you.
For indoor folks, it’s a good cost-effective time to shop for those you love that are outdoor folks. Read on.
This is my personal choice for a field accessible stove.
I’m new to the modern sub-compact gear for cooking, warming, staying comfortable and surviving by any other term. What I have recently discovered is that the new gear is startlingly small, surprisingly efficient and pleasingly affordable.
In fact, I’m from a retired engineering career and I found the gear to be more than durable. I’m not easy on gear, my grandkids are worse. This gear has become my legitimate partner for just about everything in my outdoor life. AND, maybe best of all, it is so small.
The stove will fit into your hiking, hunting or fishing jacket pocket, or your parka, or easily into a small backpack or fanny pack with room to spare. The stove can go anywhere because it is so small and light. Made from stainless steel and aluminum, the GSI Outdoors Pinnacle 4-Season Stove (Item 56003) measures 2” x 1.8” x 3.2” in size! Imagine that. As I said, I’m startled by the small size and weight. It weighs under 6 ounces. Purchase just one in your lifetime and keep it for your lifetime.
This 13.4 ounce isobutane canister is perfect for size and provides lots of energy for the stove.
The stove is powered by a small fuel source (isobutane) in canister form (Item 56022) that also fits into your pocket at a size of 4.3” x 4.3” x 3.7”. So compact, yet so powerful, it will warm your chilled fingers or cook a mini-gourmet meal of your choice wherever you are. I carry two of these…just in case. Just in case we need to cook fish, deer, alligator, elk, or the simple things like soup and hot dogs. It’s good to be prepared!
Down south in the Florida warm weather of December through April, beachcombers and picnickers find good use for such compact gear, kayakers too, for an island picnic lunch. For outdoor folks anywhere, this gear is just right.
With the compact source of heat and stove all set, the Glacier Stainless Camper Set (Item 68181) adds a 3-liter pot, 2-liter pot, strainer lid, 9” fry pan, four 14 ounce mugs, four 14 ounce bowls, four plates 7-1/2’ across, four sip-it tops, and a folding pot/pan gripper, and it all is nested within itself to form a rugged, compact stack that fits into a wash basin carrier. All of that in a size of 8.3” x 8.3” x 5.3” if you can imagine that. It weighs 4 lbs 9 oz. Unbelievable.
This is a cooking set where everything is there and it all STILL FITS into such a small space. Truly an amazing feat for all to cheer.
If you are as demanding as I am on my gear, this system represents a unique solution of ingenious cookware and eating-ware designed to finally meet the needs for those of us that enjoy great outdoor meals without the baggage and volume of usual home style cookware.
Plus, the modular design can be configured for backpacking, camping or anything in-between, with the exact pieces required for 2-4 people to enjoy a gourmet meal on the go, or just to warm your buns, if you know what I mean.
I’m sure we agree that eating, drinking, keeping warm and staying comfortable are life necessities wherever you go in the outdoors. With all the compact gear identified, what did we forget? We need a table!
More exactly what is in the 68181 cooking set. It’s all there for 4.
There is a new small, ultralight table designed to keep food and drink off the ground. It is multi-purpose, can fit in your pocket, can be used for picnics, lawn concerts, on the beach, for backpacking, fishing, hiking, biking and kayaking anywhere that food and drink can be enjoyed. The 14-ounce table is an 8.5” x 12” folding platform that compacts to just 0.6” thick x 4” wide. So small. It’s strong too, constructed of sturdy, flame and heat resistant aluminum and
This tiny tidbit of a table is MOST USEFUL and is strong, will hold 20 lbs.
stainless, it will hold 20 lbs. Raised edges help keep items from sliding off. I carry two of these on my trips in search of crisp morning mist and the serenity of a beautiful orange sunset. I carry it all, because it could just be me on a scouting adventure or could be me, my wife and all of our hungry grandkids tagging along on that next adventure. But, it’s all so small and so big.
GSI Outdoors also offers a larger table too. Download the catalog and order a few new holiday gifts for your favorite people. Amazon carries most of the above with free shipping options. For more details on the specific gear mentioned here, check it out online at http://www.gsioutdoors.com/. Download the “GSI 2018 Workbook.”
Transform your next adventure with this compact outdoor gear that allows you to be prepared to satisfy many needs, literally.
By Forrest Fisher w/Missouri Dept. of Conservation
Ingredients:
A season supply of finished venison sausage looks and tastes good. Nick Hattler photo
5 lbs. venison
1 lb. fresh pork fat
2-4 tablespoons salt (I use Morton’s Tenderquick)
Instructions:
Grind the meat and fat thoroughly, mix in salt and add one of the seasoning recipes. Knead one of the seasoning mixes listed below into meat. Keep mixture cold.
Salami Seasoning:
2 tablespoons sugar
1 tablespoon cayenne pepper
1 teaspoon ground cloves
1 tablespoon fine-ground pepper
2 teaspoons garlic powder
3/4 cup dry milk (mix to a thin paste)
Sausage Seasoning:
2 tablespoons sugar
1 teaspoon cayenne pepper
1 1/2 tablespoons chili powder
1 tablespoon garlic powder
1 1/2 teaspoons ground celery seed
3/4 cup dry milk (mix to a thin paste)
To stuff and cook the sausage, you can use casings available from a local meat processor or aluminum foil wrapping.
If using casings, follow instructions for the type (run water through animal casings). To fill, use stuffing attachments for your meat grinder and pack tightly into casings.
For foil wrapping, place 1-2 pounds of mixture on a rectangle of foil and pull up opposite sides. Press to pack meat tightly, then fold the foil tightly against the meat. Turn and roll ends until tight.
Bake sausage in the oven by placing the stuffed casings or foil on a rack in a baking pan. Bake for 1 hour and 20 minutes at 300F. Remove and cool rapidly.
Many thanks to the Missouri Dept. of Conservation for sharing their recipe with us: https://nature.mdc.mo.gov/discover-nature/recipes/venison/basic-deer-sausage-three-seasoning-mixes.
We all look for better ways to share in the bounty of fat-free deer meat found on our lands across this great country, here is one easy recipe that will make old, new or tough deer meat, as tasty as can be. Joe Forma photo
By Fern Fisher
Many of my outdoor guide friends in the mid-west and northeast use this recipe, or a recipe quite similar to this one, to share in the bounty of fat-free deer meat found and harvested on our lands across this great country. It’s easy, tasty and healthy.
Ingredients:
1 pound ground venison
1 egg
1/2 cup seasoned bread crumbs, adjust with addition of water to mix for proper burger forming consistency
1/4 -1/2 cup finely chopped sweet onion
2 tbsp. minced garlic
¼ cup tomato ketchup
3-4 tsp Olive oil for coating alum foil
1 can Campbell’s mushroom soup
1 large fresh Portabella mushroom
1 fresh sweet pepper, color of your choice
Salt, Pepper, ground Chives
Mixing ingredients: Add the beaten egg, garlic, sweet onion, ketchup, a ½ tsp of salt and ½ tsp of black pepper to the ground venison. Add enough water to make the mix pliable, the ingredients will combine to a delicious flavor. Add enough Italian bread crumps to keep mixture from becoming too watery. Form about 4-5 burger patties by hand that are about 1/2 to 3/4 inch thick.
Poaching – Can use Grill or Oven: Cut some aluminum foil large enough to fold around two burgers so a seam can be made on the top for two burger patties. Coat the area where the burgers will be placed with a few drops of olive oil. Place the burgers. Add one full tablespoon of undiluted Campbell’s mushroom soup to the top of each burger. Top with slices of Portabella mushroom, top with thin slices of sweet onion and thin slices of red, yellow or green pepper. Then close up the aluminum foil making it a bag-like compartment, making the foil almost airtight. Before closing completely, place 3-4 Tbsp. of water inside the folded foil with the burger (for steam).
Place the foiled burger in a 325 degree oven for 15 minutes, or on a grill (low) for 20-25 minutes. The goal is for a finished burger that is done, but not over-done. Remove from heat just when the water you added has been boiling for 2-3 minutes (you can hear it if you’re on the grill).
The foil keeps all the moisture in and allows the meat to cook in its own juices. It’s a mini-pressure cooker! This is easy and if you prepare ahead of time, you can cook 30 – 40 burgers for a small army of visitors all at once.
Add a slice of fresh sweet onion, a fresh leaf of lettuce, a fresh slice of tomato and your favorite topping condiments. My family simply enjoys the flavor without any additional toppings. Another option, of course, is to add a slice of your favorite cheese.
Of course, all of this on a hard roll of your choice, unless you’re watching the carbs.
Bon appetite! Served with hearty bread and left-over wine, wild turkey is simple to make and is delicious beyond measure, especially with a young bird.
By Jim Low
Rain and wind made hunting conditions less than ideal for the first week of this year’s spring turkey season in Missouri. As a result, I wasn’t feeling choosy when a sassy jake made amorous advances to my hen decoy at 6:30 Sunday morning.
Slice breast meat across the grain before flattening each cutlet.
Bragging rights don’t come with shooting jakes, but the upside is that they are fine eating.
I put the legs in the pressure cooker for half an hour and boned out the meat, then ran it through the meat grinder for use in turkey salad sandwiches.I don’t use seasonings, because wild turkey leg meat has its own rich flavor, as if it had been cooked with a mix of herbs.
I planned to brine the breast halves and smoke them over charcoal and sassafras wood, but before I got started, I sat down to spend a little time with my long-suffering wife.She was watching a cooking show, where the celebrity chef was making chicken parmesan.It looked so good, I decided to try it with some of my jake’s breast meat.It was amazing.I didn’t measure anything, but here’s how to do it.
Slice about a pound of breast meat across the grain half an inch thick and flatten the resulting cutlets with a tenderizing mallet.Coat both sides with equal parts of grated parmesan cheese and Italian-flavored bread crumbs.Fry the cutlets in a big, deep skillet or Dutch oven with olive oil until they are golden brown. Transfer them to a plate and set aside.
Coat cutlets with bread crumbs and fry in olive oil.
Add olive oil to the skillet and sauté three medium-sized, diced yellow onions and three large cloves of minced garlic until the onions begin to brown.
Add an 8-ounce bottle of sun-dried tomatoes – including the oil they were packed in – and cook another five minutes.Remove the onion mixture to a bowl and set aside.
Add 1½ cups of dry white wine to the skillet and scrape the bottom to dislodge the delicious remains of frying. Simmer this liquid until it is reduced by half.Add 8 ounces of tomato sauce and season with fennel, oregano, rosemary and/or basil.
Sauté onions, garlic, sun-dried tomatoes until the onions caramelize.
Return the onion mixture to the skillet and stir in an undrained, 8-ounce can of mushroom pieces.
Place the turkey cutlets on top, cover and cook for 30 minutes.
Serve with toasted and buttered slices of hearty, herbed bread.I happened to have a loaf of “herb de Provence” bread that I bought for half-price from the mark-down rack at a local supermarket. It was perfect for the occasion.Crusty French bread would be good, too.
Add a dollop of sour cream on the side if you aren’t afraid of the calories.
Garnish with fresh chopped scallions and shaved parmesan cheese, and congratulate yourself for doing justice to a magnificent game bird.
Add white wine, tomato sauce, mushrooms, seasonings and meat.
Each Hi Mountain Seasonings Sausage kit, Jerky Cure & Seasoning Kit and Snackin’ Stick Kit comes with everything you need: seasonings, cure and casings. The entire line of products, cooking tips, instructional videos, and recipes is available at www.himtnjerky.com.
Spring is a great time to go through the freezer to clear out older harvests and turn them into some great, healthy snacks like jerky or sausage. Whether you have an abundance of ducks or geese, fish or game meat, Hi Mountain Seasonings has a jerky & seasoning kit to turn that aging meat into healthy, mouthwatering treats. Don’t let any of your harvests go to waste; simply turn them into jerky or sausage for easy to grab-and-go summer snacks.
Each Hi Mountain Seasonings Sausage kit, Jerky Cure & Seasoning Kit and Snackin’ Stick Kit comes with everything you need: seasonings, cure and casings. All can readily be made in the convenience of an oven, smoker or dehydrator, and it is a fun project for the whole family.
With 21 different Jerky Cure & Seasoning Kits, 14 Snackin’ Stick kits and 12 Sausage Making kits, finding a Hi Mountain Seasoning kit won’t be a problem, but narrowing down the selection might be.
This spring clean out the freezer and make some delicious, healthy, palate- pleasing treats for the entire family. Jerky Cure& Seasoning Kits season up to 10 pounds of ground meat or 15 lbs. of whole muscle meat and retails for $7.99. Snackin’ Sticks season 20 lbs. of meat and retail for $21.99. The Sausage kits each season 30 lbs. of meat, with the exception of the Bratwurst kit that seasons 24 lbs., the Salami kit that seasons 18 lbs. and the Hot Dog kit that seasons 23 lbs. All sausage kits retail for $20.99 with the exception of the Hot Dog kit, which retails for $19.99.
Hi Mountain’s entire line of products, cooking tips, instructional videos, and recipes are also available at www.himtnjerky.com. Hi Mountain products also can be found at high-end sporting-goods stores, farm-and-ranch stores and many local grocery stores.
Located in the heart of Wyoming, Hi Mountain Seasonings was founded in 1991. It is the premier manufacturer of kits for homemade jerky and sausage. Hi Mountain Seasonings has successfully captured distinct, traditional Western flavors in its jerky cure& seasonings, Western-style seasonings, bacon cures and other products that make up the unique line of gourmet Western seasonings. For additional information, write: Hi Mountain Seasonings, 1000 College View Drive, Riverton, WY 82501; call toll-free 1-800-829-2285; or visit the company website at www.himtnjerky.com.
Ingredients for 16 (8oz) servings: 1-1/2 lbs ground Elk (or Venison) 3 Tbs canola oil 1 cup onions (diced coarse) ½ cup green pepper (diced coarse) ¼ cup Jalapeno pepper (diced fine) 2 Tbsp. garlic (minced) 3 Tbsp. olive oil 2 Tbsp. chili powder 1 Tbsp. black pepper 1 Tsp. salt 1 Tsp. cumin 1 can (28oz) diced tomatoes 2 cans (15 oz) kidney beans 2 cans (15 oz) pinto beans 1 can (22 oz) tomato sauce 2-3 sprigs cilantro (chopped) Optional –fresh parsley or cilantro garnish, shredded cheddar cheese, sour cream – when serving.
By Fern Fisher
Heat oil in frying pan on medium heat, add onions, green pepper, add pinch salt, garlic, chili powder and cumin. Cook until onions turn translucent and meat is brown (about 7-9 minutes). Occasionally stir with wooden spoon.
Add cooked mix to crock pot, add diced tomatoes, tomato sauce, beans, and remaining ingredients, stir to mix.
Cover and cook for about 8 hours on low or 6 hours on high.
Serve with crackers or bread and butter, add a pinch or two of shredded cheddar cheese. Delicious.
Flavor and taste is even better if this is made a day or two ahead of when needed.
Need 3 Gallons of Soup Quick? This simple recipe is so easy and fun. Just slice, dice, toss into the Can-Cooker, turn on low heat and come back in 90 minutes. Let it cool a bit and this will feed your family or your entire deer camp crew for several days.
The soup is so tasty that one 8-ounce serving with a slice of your favorite bread/butter will often beckon your taste buds for another serving.
Tasty, nutritious, zero fat. Hard to beat! Store it cold after initial servings, but on day 2 and 3 – it tastes even better. Ladle soup into a bowl with the tasty Kluski noodles, place in the microwave for another quick and tasty meal.
The list of ingredients shown here will make about 36 servings of about 8 ounces each.
Directions:
To a large frying pan, add 2 Tbsp. olive oil, 1 Tbsp. minced garlic and ½ cup of onions, turn on medium heat. Add the cubed venison and gently turn to brown all the meat over 10-15 minutes.
While the meat is cooking, to the large Can-Cooker, add all the remaining ingredients. Turn heat to high with can cooker cover in place. After 15 minutes or so, add the browned meat, snap the cover in place. Turn to simmer for 90 minutes.
On the side in a 1-gallon pot, bring 6-7 cups of water to a boil, add 1 Tbsp. Olive Oil and the Kluski noodles. Bring back to a slow boil for about 8-9 minutes or until noodles are soft. Drain the noodles and prepare the soup bowls.
Serve the soup with a generous portion noodles, add a slice or two of bread and butter on the side. Mmmm, so good. Enjoy!
This is a no-brainer. Mix some of your favorite beer with dry Italian seasoning mix. Pour that into a crock pot with your venison. Slow cook until you can shred the meat, throw in a handful of pepperoncini’s, cook a little longer then serve on a bun with some Pepperjack. Done. Delicious.
This is a perfect recipe for big buck loins or the hams/butt roasts of younger deer.
Ingredients:
3-4 venison chunks
1 bottle of beer
1 packet of dry Italian seasoning mix
1 onion
4 pepperoncini
Cooking instructions:
Cut venison into large chunks and place in crockpot
Mix beer and seasoning, then pour over venison
Cook on low for 6-7 hours, or high for 5-6 hours
Shred the meat, Add 5 or 6 pepperoncini’s and stir
Cook another hour or two, then serve on rolls with shredded Pepperjack or Mozzarella cheese
For even more recipes and outdoor cooking details, see: http://www.danstefoutdoors.com/italian-venison-with-lakemaid-beer/.
You don’t need fancy gear or ingredients to prepare a feast fit for a king.
My first forays into cooking anything other than scrambled eggs often involved ground beef and cream of mushroom soup. Those dishes weren’t sophisticated, but they were fast, easy and sustaining for a college student for whom “middle-age spread” was still several years away.
Campbell’s got less and less of my business as my waistline expanded and my cholesterol level climbed. Until a couple of weeks ago, I couldn’t remember the last time I heard the delicious slurp of a slug of condensed soup slid out of a can into a casserole dish. But as dove season approached, I was in the market for an easy, delicious way to prepare dove breasts in camp, and I reverted to old habits with a few twists acquired in the intervening decades. The resulting feast was so wonderful, I was eager to repeat it. I got my chance on Saturday, September 17, 2016, which was the opening day of Missouri’s early teal season.
Even more than most waterfowl hunting, teal season is a crap shoot. It lasts only 16 days and if you don’t get a substantial cold front to push birds down from the Dakotas, or if you can’t be in the marsh when a migratory pulse occurs, you will spend the morning looking at empty skies. That has been my experience for the past few years. This year’s season opener, however, was the kind that sustains the zeal of teal devotees through the lean years. We saw more teal before sunrise than we had during the entirety of the previous five seasons combined. When the morning flight petered out around 10 a.m., I had five blue-winged teal to work with.
Browning meat develops savory flavors you can’t get any other way.
Back at camp, I fired up my Coleman propane stove and browned the breasts in olive oil in a cast iron Dutch oven. When they were on the dark side of golden, I set them aside, added another two tablespoons of oil and four medium-sized, sliced onions.
When the onions started to caramelize, I added some garlic powder, salt, pepper and cup of full-bodied red wine. I stirred with a steel spatula, taking care to scrape the goop off the bottom, then stirred in two cans of cream of mushroom soup and a can of water. I kept stirring the mixture on high heat until it started to bubble, then turned down the burner as low as it would go and placed the browned breasts on top of the onion-wine-soup concoction. I sealed the Dutch oven with its tight-fitting lid and set my cell-phone timer for 45 minutes.
Cook onions until they begin to caramelize, leaving some slightly crunchy.
Before starting this process, I had lit half of a small bag of self-starting charcoal in the fire ring. It was now covered with gray ash and ready to cook. After spreading the coals out in a flat bed, I peeled and sliced a large sweet potato and put the slices on a sheet of heavy-duty aluminum foil. I salted the potatoes, added some squeeze margarine and a liberal sprinkling of real bacon bits, then folded the foil over and sealed the package. Then I laid out another sheet of foil, laid the packet top-down on this second sheet and sealed it snugly. This inverted double wrap makes it possible to turn the packet over and cook both sides without spilling the liquid inside.
When 45 minutes were up, I checked the doneness of the breasts. The larger ones were still a little rare for my taste. The last thing you want to do to waterfowl is cook it beyond medium-rare. The result will be tough, dry, livery-tasting meat. However, duck tartar is not my cup of tea, either. The sweet potatoes were perfectly cooked at this point, so I took them off the coals, wrapped the two too-rare breasts in foil and finished them on the coals. Fifteen minutes later, I was ready to eat. OMG. Medium-rare teal breast and potatoes smothered in mushroom gravy. Heaven.
Simmer until the meat is rare or at most medium-rare.
I ate until I was stuffed, then continued to snack on potatoes and gravy as I cleaned up the kitchen area, set up my tent and savored the left-over wine. That combination, plus having been up at the crack of dawn, beats any sleeping pill on the market. I read only half a page of my book before falling sound asleep. The glow of sunset hadn’t even faded from the western horizon. Perfect timing, since I planned to do it all over again the next day.
Who cares if this cholesterol fest shaves a few days off the end of my life. By then I’ll probably be in a nursing home, eating hot dogs and pureed spinach. It seems like a good trade-off to me.
I like sweet potatoes, but this recipe is equally good with Idaho potatoes.
With so many folks changing to a more healthy diet, many to a gluten-free diet due to Lyme disease, Celiac disease or for other health concerns, we have this delicious spaghetti recipe in our house at least once every week or two. The Barilla Spaghetti Noodle (pasta) is made with corn and rice, contains no GMO ingredients and is certified Gluten Free. As the noodles are the base for this recipe, the great taste and texture of this brand is excellent for all of your favorite pasta dishes, especially when you combine it with the tasty venison burger. The bread you see is gluten-free baker’s bread that is available at a local health bakery near Orchard Park, New York.
The list of ingredients shown here is to feed four adults and four kids at our dinner table.
Directions:
To a large 1-gallon pot, bring 6-7 cups of water to a boil, add 1 Tbs Olive Oil, the Barilla spaghetti noodles and bring back to a slow boil for about 8-9 minutes, or until noodles are soft.
While the noodles are simmering, in a large frying pan, add Olive Oil, Minced Garlic, Sweet White Onion, Red and Green Peppers and the Venison Burger. Cook about 4-5 minutes to brown the meat.
Drain the noodles and return the noodles to the large pot. Add the cooked venison burger mix to the large pot.
Add the Spaghetti Sauce and gluten-free Mushroom Soup to the large pot and gently stir. Turn the stove burner to simmer level. Add salt and pepper to your preference, Chile powder and hot sauce, as desired. Let simmer for about 30 minutes. The flavor exchange and the mix of ingredients with noodles taste so good.
We serve the spaghetti with portions of one or two of these at the same meal: broccoli, peas, green beans, asparagus, celery or a lettuce salad that includes cucumber and spinach.
Cut fish fillets into 1 x 1 inch cubes and lightly coat with Badia Adobo seasoning (no msg). Allow to sit for at least 30 minutes while preparing the remainder of the recipe.
In a 1-gallon cooking pot, add the olive oil and sauté the onions and sweet pepper, adding the salt, chili powder, pepper and oregano. Stir gently until soft. Aroma is so sweet!
Add the diced tomatoes, kidney beans and tomato paste, stir occasionally until simmering,
Add the cubed fish, reheat to simmering (about 10-15 minutes), remove from heat.
Serve with crackers, hard rolls or rye bread and butter, add a pinch or two of shredded cheddar cheese. Delicious.
Easy to make, low-fat, tasty and healthy. Enjoy!
NOTE: This recipe is a good one that you can pre-prep for a camping trip. Make the chili portion without the fish ahead of time and chill the night before leaving. Place in a 1-gallon storage container and store in your cooler while travelling. Wait until your family catches some fish the next day, clean, rinse, dice and add the Adobo coating. Heat up the pre-made chili, add the freshly caught fish, cook for an additional 15 minutes. Done, delicious!
First, rinse off the meat, then cut your venison back-strap or venison sirloin into cubes of about 1” x 1” size. Cut-off any excess fat, as venison fat tastes bitter and tart.
Add some chicken to the mix too – if you like, cutting to the same size, and then toss into a sealed plastic bag, pour in enough liquid Bragg’s Organic Dressing and Marinade to coat the venison and chicken pieces in the bag when you shake them up. Let them stand in the refrigerator for about 3-4 hours to absorb the healthy goodness that this product delivers.
In the meantime, take a few minutes to slice-up one each of a young green squash (zucchini), yellow squash, red pepper, yellow pepper, green pepper, mushrooms and onion Can you tell I like peppers?!
After the marinade soak time, place one piece each of the venison, chicken, fresh peppers and squash pieces to a wooden skewer, as shown in the picture above, and prepare for the grill.
Coat the grill with a light coating of non-stick olive oil.
Pre-heat grill to 350 degrees (or pretty hot if you don’t have one of those cover gages) and place the loaded skewers on the grill for about 20-25 minutes, turning them at least 3-4 times during that period. The key with outdoor grilling is to allow the chicken to reach 165-170 degrees – not too much higher, so it is cooked, but remains juicy.
Remove from the grill, sample to measure cooking completeness to your desired level. Check with a thermometer to insure chicken has reached 165-170 degrees.
Serve with other dinner meal standard foods. We like cottage cheese or brown rice, fresh vegetable (broccoli, green beans, corn, peas, etc.), any other favorite toppings you may like, such as hot sauce. Add a sprig of fresh parsley or two for even more color. The hot apple pie and ice cream topping is another recipe! My family loves this dinner platter.
Easy, low-fat, healthy! Enjoy.
Bragg’s Organic Marinade Information: The Bragg’s Ginger & Sesame Dressing and Marinade is based on the delicious flavor of their famous Bragg Liquid Aminos. Ginger and Sesame seeds are blended into the smooth, zesty dressing, then combined with Bragg Organic Apple Cider Vinegar, Bragg Organic Extra Virgin Olive Oil, Bragg Liquid Aminos, organic honey, organic lemon juice, organic garlic, organic ginger, organic sesame seeds, and natural xanthan gum. Besides bringing salads to life, it can be used to spice up Chinese stir-fry, chicken, or grilled vegetables. This sweet and tangy taste brings you another dressing with the best of the Bragg tradition of eating and living. GLUTEN FREE • NON-GMO
Every year in early March, I attend the World Fishing and Outdoor Expo in Suffern, New York. During the course of the four day show, I usually share outdoor recipes with former state trooper Dave Rath of Fulton, New York, and many other friends along the way. Another favorite game recipe friend is John Yonke of Putnam County, a retired Environmental Conservation worker from New York. Not just sharing the recipes in writing, but physically cooking them up and chowing down on everything from salmon and trout to pheasant, goose and venison recipe concoctions, we snack away (together) to our hearts content on outdoor game that make our palate smile.
One of my absolute favorites is a corned goose breast that Rath brings to the table every year. If you think that goose isn’t in your wheelhouse for favorite outdoor game meats, you need to try this recipe. I was a goose fan anyway, with three or four recipes from teriyaki jerky to goose kabobs that have marinated in a combination of Weber’s horseradish mustard and Italian dressing. This one is at the top of the list.
The Rath Recipe: Simple and Tasty!
Take four goose breasts, cleaned and ready to go. Put four cups of water into a gallon-size sealable plastic bag (or container) and add a cup of Morton’s Ready-Quick along with one to two tablespoons of pickling spice and one chopped onion. Place all of the ingredients into the bag and let it sit in the refrigerator for 48 hours, turning occasionally. If you are not ready to cook the goose breasts yet, you can toss them into the freezer with a little bit of the liquid added.
When you are ready to start the cooking process, rinse the goose breasts well. Place into a slow cooker and add some potatoes, carrots, onions and celery. Add a half a cup of wine for a little extra flavor, red or white, but red is preferred because goose is more like beef. Add a little salt and pepper to taste, the only other spice that you will need. Cook approximately 4-5 hours on low and then be prepared for some excellent eating. Carve the meat in thin slices, make sure you are cutting against the grain of the meat. You will not “diss” goose meat again and it could even give good cause to hit the fields when geese become fair game in local fields and waters. Enjoy! And make sure you share with a friend.
Using an old-fashioned slow cooker/Dutch oven that can go on top of the stove or in the oven, culinary master-chef, Cameron Tait, provides the trail to understanding the power of properly blended ingredients, including one super-secret ingredient called “star anise”. The blended flavors of apples, sour cherries, molasses, barbecue sauce and a bit of beer (ale), is used to break down the tough cut of a boar shoulder, normally full of tough muscle, but totally flavorful and downright delicate to the taste when cooked this way. Watch and learn!
3 Lb wild boar roast rubbed with salt and pepper
1 onion chopped
one carrot sliced
2 red delicious apples, diced
1 bottle beer, 12oz
8 oz sour cherries with juice
3-4 cups water
3 TBS molasses
1/4 cup BBQ sauce
1 star anise(whole)
3/4 cup additional BBQ sauce
salt and pepper if necessary.
Add all ingredients and place in a slow cooker, place on high. Wait till the mixture has come to a light simmer, turn on low and cook for a minimum of 8 hours, make sure boar is very tender.
Remove boar, set aside to keep warm.
Reduce remaining liquid by 50%, skim off all remaining fat and impurities and strain, discard solids.
Add 3/4 to one cup of more BBQ sauce, set aside.
Shred the boar into smaller pieces, add the cooled sauce mixture, season with salt and pepper if necessary.
Serve on a fresh Kaiser or my favorite, focaccia bread.
Master chef Cameron Tait shares his fastest, great tasting recipe for roast duck breast. Using skewered pickled and roasted vegetables with beets, peppers, rosemary and thyme, the skinned duck breast is seasoned with blackened Cajun seasoning, pineapple Jalapeno jelly (that adds spice and sweet together), orange marmalade and just a searing hot Teflon coated pan with a tablespoon or two of olive oil, cook on one side for 30 seconds, flip over add an optional dash of your favorite liquor (such as lemon chelo) or a fortified wine while cooking for another 30 seconds, remove from the heat, let them rest for in the pan another 30-45 seconds, serve with the skewered vegetables. Mmmmm good! Easy and taste is fantastic! Get out there hunting!
Duck Breast Roasted Vegetables
2-4 duck breasts, skin and fat removed
blackening seasoning
1 tsp olive oil
2 TBS Orange marmalade
1/4 cup orange juice
1 TBS butter, chilled
Vegetables
Baby carrots, peeled cut in half
Small beets, peeled, cut in quarters
2 bell peppers, cut into quarters
Freshly ground black peppercorns
1 tsp (5ml) chopped fresh thyme
Kosher salt
Olive oil
Fried carrot strips for garnish
Pea shoots for garnish, optional
Cut and prepare all of the vegetables, toss in oil and seasoning and place on a parchment lined pan, preheat oven to 400 degrees F.
The vegetables will take between 30-45 minutes, cook duck to be ready at the same time.
Remove duck from fridge, place on paper towel to absorb excess moisture.
It is best to use a Teflon pan for cooking the duck, place on medium-high heat, add a small amount of olive oil. Season
the duck with Kosher salt and black pepper, sear on both sides till golden brown, add orange juice then the marmalade. Simmer duck in juice on low for about 5-7 minutes for larger breasts, 2-3 for smaller, internal temperature should be around 130 degrees F.
When finished, remove from pan, place on a plate to rest. In the meantime, check seasoning and doneness for the vegetables in oven, when finished place on serving tray.
Rest duck for 10 minutes, in the meantime, reduce liquid by half, swirl butter in at last moment.Slice the duck thinly and place on top of the vegetables, pour remaining sauce over top as well. Indulge!
Using the easy to flake-apart boar shoulder we cooked in the last episode, make a bowl of pulled meat, add a blend of hickory smoked barbecue sauce and Hi-Mountain steak rub (which provides a blend of tasty seasonings) in bowl, mix, slice some focaccia bread, spread the boar on the bread to make a tasty sandwich that can be used out on the ice for your next fishing trip or for lunch to work the next day. You can store the mixed meat in a refrigerator or freeze it for long term. Healthy eating!
3 Lb wild boar roast rubbed with salt and pepper
1 onion chopped
one carrot sliced
2 red delicious apples, diced
1 bottle beer, 12oz
8 oz sour cherries with juice
3-4 cups water
3 TBS molasses
1/4 cup BBQ sauce
1 star anise(whole)
3/4 cup additional BBQ sauce
salt and pepper if necessary.
Add all ingredients and place in a slow cooker, place on high. Wait till the mixture has come to a light simmer, turn on low and cook for a minimum of 8 hours, make sure boar is very tender.
Remove boar, set aside to keep warm.
Reduce remaining liquid by 50%, skim off all remaining fat and impurities and strain, discard solids.
Add 3/4 to one cup of more BBQ sauce, set aside.
Shred the boar into smaller pieces, add the cooled sauce mixture, season with salt and pepper if necessary.
Serve on a fresh Kaiser or my favorite, focaccia bread.
Jackson Semeyn is one happy youngster after catching this beautiful Speckled Trout near Tampa Bay, Florida, while fishing with his charter captain dad (Jason), sales manager for iTrekkers.com charter fishing group.
A lot of people are looking for these kind of gluten-free, sugar-free recipes today as learn more about how to stay healthy, and after two of my grandchildren were diagnosed with Lyme disease, it was necessary to change their diets to control negative reactions from their medications.
The doctor advised a sugar-free, gluten-free diet for all meals. They love fresh fried fish during lent and at other times, and I discovered that it was possible to change the “old recipe” to meet the new diet by simply changing the type of flour. Here’s the list of ingredients and the process to feed 8 people at our dinner table (none of them could tell it was gluten and sugar-free!):
We used Bob’s Red Mill Almond Meal because it is ground from whole, blanched sweet almonds and is gluten free. Almonds are one of the healthy nuts providing manganese, vitamin E and protein, and is low on carbs.
Directions:
Thoroughly rinse the fish, check for bone-free fillets, cut them into a size that will conveniently fit your fry pan. Then pat dry with a paper towel.
In a small bowl, beat the eggs and set aside.
In another small bowl, place an amount of almond flour.
Place the fish into flour bowl and coat both sides of the fish.
Take the flour coated fish and dip through the beaten egg.
Place the egg-coated fish and roll into the Hodgson Mill gluten free seasoned coating mix.
Then place the fish into the heated fry pan with the olive oil, fry on one side for about 3-minutes, then turn and fry the other side in the same manner.
Place the hot fish on a platter coated with paper towels to drain.
Serve with cooked brown rice portions and fresh-cooked vegetables of your choice. We like portions of one or two of these at the same meal: broccoli, peas, green beans, asparagus, celery or a lettuce salad that includes cucumber and spinach.
Scrumptious, delicious, healthy and meets all the new rules! Enjoy!
This is a great time to relish the satisfaction of delicious meals that can result from the success of MSG-free sportsmen pursuits of hunting wild game and fishing.
There is something very special about the culinary delights that connect us to conservation practices, the purity of organic food from wild harvest, and the reality of incredible taste from this healthy food source.
Great tasting healthy food helps to justify the cost of the license and gear, and all the time we spend learning about how to be successful.
A few years ago, my family started looking around for proven recipes that would provide even more range on how we prepare the wild bounty from our lands and lakes around us. We discovered the “Wild Harvest Table” from Cornell Cooperative Extension nutrition educator, Moira M. Tidball, a culinary aficionado who enjoys cooking all kinds of wild game and offers free, proven, advice. The result has been delicious and nutritious!
For this Super Bowl weekend, we are preparing a crowd-pleasing recipes that has become one of our favorites: venison nachos. They are awesome! Let me share with you that there is never any leftovers from either recipe.
For the venison nachos, health consumers today all appreciate that using the venison instead of beef lowers the fat content of typical nacho recipes, that’s all good. This recipe is quite simple.
In a stock pot, add one tablespoon of olive oil and brown the venison over medium-high heat. Add one medium to large chopped white sweet onion and cook 3-5 minutes more until the onion is translucent. Add 2-3 cloves of minced garlic and 2-3 tablespoons of chili powder, cook another minute (don’t let the garlic get brown). At this point, adding one teaspoon of oregano and one teaspoon of cumin is optional, if you like those flavors (I do). Then add one tablespoon of brown sugar and one 28-ounce can of diced tomatoes (or one quart of home canned tomatoes) and gently stir the entire mix in the pan.
Bring the mixture to a gentle boil, once there, lower the heat and simmer the chili about half an hour until it thickens and starts to smell “so good!” Then add one 15-ounce can of red kidney beans or black beans, your choice, but drain and rinse before adding. Then cook 20 minutes or so until heated through and the consistency is thick. Season to taste with salt and pepper.
We then pour the mix into a wide baking dish, sprinkle one cup of shredded cheddar cheese over the top and place it in the oven preheated to 400 degrees. Heat some tortilla chips in the oven at the same time. Remove when the cheese melts (about 6 minutes or so). Spoon some of the mix right into the warmed tortillas, add some sour cream topping and dig in!
Nutritionally, a one cup serving is about 360 calories, offers 25 percent of daily adult needs for Vitamin A and Calcium, 30 percent for Vitamin C and 20 percent for iron, with 24 grams of protein!
Cooking duck breasts is easy and fun. Use a little Olive Oil, you’ll need a fillet knife to remove the skin from breasts, slice thin, marinade for 4 hours with lemon flavored soy sauce and teriyaki-garlic-onion cooking sauce, add to a hot Teflon pan, then sear to cook, done in less than 2 minutes! Easy, delectable! Step-by-step video!
Simple and Delicious Venison Steak
… Easy and Fun from Freezer to Dinner Plate
This simple venison steak recipe we mostly use for the backyard grill, but it can also be easily cooked in the broiler of your kitchen stove, on a griddle-plate or in the colas of a wilderness hunt campfire a hundred miles from civilization. It’s easy and delicious!
First, trim your steaks of any obvious fat as venison fat is not sweet, it is tart when cooked. On both sides of the steak(s), rub in a dash of salt, pepper and any of your own personal favorite garden herbs. Then, on a sheet of heavy aluminum foil large enough to allow fold-over and enclosure of the steak in the middle, spread a drop or two of olive oil on the bottom where the steaks will be placed.
Position the steak(s) in the center of the foil (can place two small steaks side by side), smear the top of the steak with a tablespoon or two of Campbell’s mushroom soup, right from the can. Carefully place a semi-thick slice of sweet onion on top of that, add a thinly sliced collection of red or yellow peppers atop the onion, drop in a quarter teaspoon (or so) of minced garlic and carefully start to fold the aluminum foil around the steaks to form a sort of sealed envelope package, being extra careful to leave a small opening on one top end.
In this opening, add four to five tablespoons of water. Now close-up that foil opening nice and tight, place on a medium heat grill (300F) or in an oven for 15 minutes.
The foil envelope forms a sort of mini-pressure cooker. Once cooked, you’ll be able to hear the water boiling, be very careful when you open the foil. The steam is super-heated and looking for a quick escape, so use your oven gloves. If you don’t have steam exiting, you may have cooked it too long or did not add enough water, remember that for next time.
Remove the steak from the foil wrapper and to your plate to serve with the other preparations you wish to eat. We like whole sweet potatoes, green beans or carrots and a small salad with a glass of red wine.
The steak is so tender it will literally fall apart. You can add your favorite steak sauce if you like, but most of my family simply eats right out of the wrapper from the grill.
Defrost a 3 to 4 pound frozen venison roast completely, remove all silver skin and any noticeable venison fat.
Lightly sprinkle chili powder, pepper, salt and steak seasoning (or your favorite outdoor style seasoning) and rub into the exterior surface of the roast. Cover with saran wrap and refrigerate overnight.
Peel and slice 2 cups of medium carrots.
Slice and dice 1 cup of large sweet onions of your choice.
Peel, slice and quarter 2 cups of red potatoes.
Wipe the bottom of the slow cooker with a film of olive oil.
Into the slow cooker, place the carrots first, then the roast, potatoes and onions into the slow cooker. Add 1 can of Campbell’s mushroom soup over the top of the ingredients so far
Add cold water to bring the liquid level to near the top of the cooker with about ½ inch space free. Add 2 cubes of beef bouillon into the cooker and 1 TBS of minced garlic.
Into the liquid, sprinkle ½ tsp salt and 1 tsp black pepper. You may also slice and add sweet peppers if you like.
Turn the cooker to high for 2 hours, or until the water in the cooker starts to boil. Then turn down to low for 6 hours.
Much of the liquid in the slow cooler become a thin and tasty “basting gravy.” Much of the liquid is absorbed by the meat during the cooking/baking process, allowing the meat to remain moist and tasty.
Use a fork to separate the meat and serve an ample size portion to a dinner plate size of your choice, add the slow-cooker flavored potatoes and carrots on the side. Add the basting gravy to the top of the meat, as you like.
It’s hard to beat the taste, impossible to tell the meat is anything but the best and top choice, leanest, sweet-tasting beef that you have ever enjoyed at the finest restaurant anywhere in the world. It’s delectable!
Episode 2: Learn how to debone the hind quarter and remove the flavorful shank, see process for using sharp knife with famed Butchers Hold, preparation details for roasting and stuffing, save the bone for roasting, then learn how to brown, braise, add flavor, and serve with red wine and beef stock sauce. Sprinkle fresh rosemary after all. Enjoy, Mmmm good!
Episode 1: Follow this continuing “Cooking With Cameron” series to learn and easy method on how to prepare the hind quarter of Venison (must remove the silver skin), Elk, Boar or Lamb, all are similar, essentially using the same process, including how to prepare the tough, but tasty shank, as well. Add spices, including Cabela’s Srirasha and Garlic Rub, Salt, Pepper, Garlic, together with roasted Vegetables, including Candy Cane Beets, Carrots, Onions and Red Wine. Scrumptious!
Dennis Ferraro downed this healthy black bear in Belfast, NY, with one clean shot, using a Browning BLR-81 lever-action .308 caliber rifle and 150-grain Federal Fusion boattail bullet.
By Forrest Fisher
Across the country where black bear hunting is allowed, harvesting a black bear means more than just a fabulous rug. Bear meat is delicious and healthy when properly cared for in the field and during transport and storage. Generally, bear meat tastes similar to venison – it’s wild uncontaminated red meat, though it is often a little sweeter than meat from deer or elk. It has a dark red color, and in terms of texture, it’s close to pork, though with a slightly coarser grain.
Like deer, elk, or wild boar, one of the tastiest cuts of black bear is the back strap. Smoking is one of the most delicious ways to prepare a black bear back strap.
To make it easy, try using the new Smoked Bear Loin Roast Recipe from Hi Mountain Seasonings featuring their Rib-Rub. Reading the label’s contents, I savored the flavor just thinking about the ingredients in this proven blend of spices: paprika, black pepper, salt, mustard, cayenne pepper, soybean oil, honey granules (refinery syrup/honey) and dehydrated garlic/onion. All set to go, this packaging makes tough jobs so simple that all you have to do is set up your smoker.
The process is simple. You’ll need one trimmed black bear back strap, one can of coffee beer ( I use my favorite dark IPA), the Hi Mountain Rib-Rub, canning salt, fresh ground coffee, ½ cup maple syrup and your smoker or pellet grill. Again, make sure to trim any fat from the back strap. When done, place the back strap in a nonporous container like a clean kitchen mixing bowl or storage container large enough to hold the meat. Add the beer and marinate it in the refrigerator for a couple hours. Remove and pat dry with a paper towel. Next, apply yellow mustard to all sides of the meat. Mix some canning salt with the Hi Mountain Seasoning Rib-Rub mix and ground coffee in a separate bowl. Liberally apply this mix to all sides of the meat and place it in a nonporous container. Cover it with plastic wrap and place it in the refrigerator for 3-4 hours. Remove from the fridge and let it sit at room temperature for an hour. Preheat the smoker or the smoker pellet grill to 250 degrees toward the end of that hour.
Coat the smoker rack with olive oil and place the bear meat in the smoker/pellet grill. During the smoking process, use a kitchen brush to glaze the roast with maple syrup on the exposed sides of the roast. Smoke it until the internal temperature of the roast hits 160F. Use a digital thermometer.
Slice it thin. Enjoy!
I use the same process to smoke deer, boar and elk meat. Located in the heart of Wyoming, the cost of a 10-ounce shaker bottle of Hi Mountain Seasoning Rib-Rub is $10.99. You can find it at grocery stores and outdoor retailers nationwide, but I buy it online at www.himtnjerky.com or you can call toll-free 1-800-829-2285. They never have out-of-stock issues. While you’re online, check out the dozens of other free delicious wild game recipes and their unique types of spices, rubs, seasonings, sausage and jerky kits that are ready to go.
I like simplicity.
Note: This bear was taken by Dennis Ferraro in Belfast, NY, using a Browning BLR-81 lever-action .308 caliber rifle equipped with a Leupold 3-9X Vari-1 set at 6X. Ferraro favors the 150-grain Federal Fusion boat-tail bullets, adding, “They are accurate, affordable and have proven themselves on other big game for him many times before. I bought my gun and my ammo from a retailer in Hamburg.” The 265-pound black bear was downed with one shot from Ferraro’s rifle. The male bear claws measured about one and one-half inches in length, and the paws were about six to seven inches across. The most prominent teeth on the magnificent black bear were about the same length as the claws. (L to R below) Ferarro was hunting with the father/son tag team of Rob and Bob Ciszak, and Adam Wojnowski.
Crispy chicken wings or meaty chicken drumsticks – perfect for football games!
You can fry, grill, smoke, or bake the wings at the tailgate or the house.
Dust your wings with Trail Dust, Cajun Cowboy, or Pineapple Siracha seasoning for more kick.
The Hi Mountain Seasonings Chicken Wing Bundle (www.himtnjerky.com) has everything needed for the perfect taste.
By Forrest Fisher
The 2023 football playoffs are finally here! As you gather with family and friends, folks are chomping at the bit to celebrate a team they love. Whether you’re planning a tailgate party or a house party, be prepared to serve drop-in guests the best in delicious quick-finger foods.
My better half and I usually prepare a supply of wild game meats to be cooked in a potpourri-style venue with our favorite dips and sauces for post-pot dunking on the side. Then we back that up with pre-cooked chicken wings or meaty chicken drumsticks from our air fryer at home. If we tailgate, we put them in a pot and warm them up at the tailgate on a portable cooker, but they are good cold too! Everyone loves mouth-watering chicken wings. Of course, you can fry, grill, smoke, or bake the wings at the tailgate or the house. Delicious, however you cook them.
Whatever cooking method you choose, they’re ready to eat when they hit 165F internal temperature. We use the Hi Mountain Seasonings Chicken Wing Bundle (www.himtnjerky.com) to make scrumptious wings. You brush on some olive oil and dust your wings with Trail Dust, Cajun Cowboy, or Pineapple Siracha seasoning for a little more kick. It’s all included in the bundle package, including classic Blue Cheese Dressing and Dip. It’s everything you need for a pre-game football party or a halftime household gala event.
More and more people are interested in wild table fare, which has made learning to hunt a priority.
Outdoor Alabama gives everybody the opportunity to cook wild game with unique recipes.
Outdoor Alabama gives everybody a place to share their best recipes.
By DAVID RAINER
Alabama Department of Conservation and Natural Resources
If your hunting season has gone well and you have plenty of wild game to prepare, you may be looking for new ideas on how to put the best dishes possible on the dinner table. Or you could be a novice hunter getting ready to prepare a meal with wild game for the first time and looking for helpful resources.
With that in mind, the Alabama Department of Conservation and Natural Resources (ADCNR) website, Outdoor Alabama, has just what you’re looking for in the new Wild Eats page at www.outdooralabama.com/WildEats. The page features a list of tasty recipes for a variety of wild game.
Courtesy of the Alabama Department of Conservation and Natural Resources.
“The culmination of a hunting or fishing trip is food,” said Billy Pope, ADCNR’s Communications and Marketing Director. “We wanted to provide a platform on Outdoor Alabama that gives everybody the opportunity to cook wild game with unique recipes and a place for everybody to share their recipes.
“We’re asking people to submit their unique recipes for wild game and fish. We’ve already had submissions for stir-fried duck and collard green soup with venison.”
Pope also said ADCNR realizes many late-onset hunters are pursuing wild game with a different mindset from who grew up in a hunting culture.
“People being introduced to hunting or wanting to learn to hunt are doing it for a different reason,” he said. “They want to harvest their own meat, so they know where it comes from. They want sustainable, healthy protein for their families.
“More and more people are interested in wild table fare, which has made learning to hunt a priority. ADCNR’s Adult Mentored Hunting Program has been able to fill the void and introduce new hunters to the art of field-dressing and butchering wild game.”
Justin Grider, ADCNR’s Wildlife and Freshwater Fisheries Division R3 Coordinator, said the process of placing tasty wild game dishes on the dinner table starts well before the hunt.
“Before it’s time to hunt, you need to become proficient with whatever firearm or bow you’re using,” Grider said. “You want to make sure it is shooting where you’re aiming so you can make a good, clean, quick kill. You owe that to the animal as a hunter to make that as quick and painless as possible. When you are proficient with the firearm or bow, it leads to a better end-product when it comes to putting it on the dinner table.”
When the hunter makes a quality shot, it leads to a quick recovery of the animal, and the processing of the animal can proceed without delay.
“The quicker you can get those internal organs and entrails out of that animal, especially deer, and get that body cavity cooled down, the better,” Grider said. “You’re fighting three things – heat, moisture, and dirt. You’re trying to avoid all three.
“Most days in Alabama are relatively warm, so if you don’t have access to a skinning shed, grab a couple of bags of ice from the nearest gas station and throw it into the cavity, so it starts to cool down that body cavity. Make sure you get the ice between the hip joints. There’s a lot of heat down there. When you get that cooled down, it will delay any bacteria growth and meat spoilage.”
Grider said when you’re able to get the animal field-dressed in a reasonable amount of time, it allows you to move to the next step in providing that quality wild game for the family.
“I like to let my deer age for seven days,” he said. “If you have access to a walk-in cooler, you can let it hang and allow that deer to go through rigor mortis. That whole product will start to break down and become more tender. If you don’t have a walk-in cooler, which most of us don’t, you can quarter the deer and age that animal in a 55-quart cooler.”
The key to using an ice chest/cooler is to keep the meat elevated above the ice by using some type of rack or baking sheet to keep the meat from coming in contact with any water from the melting ice. Refresh the ice often to maintain the proper temperature.
“That will accomplish the same result as if you had used a walk-in cooler,” Grider said. “That’s going to lead to your best-tasting product. Any time you can age that meat for seven days, that’s the magic number.”
After the aging process is complete, Grider starts with the hind quarters. He debones the quarters and separates the muscle groups. He trims as much of the connective tissue as possible and decides whether to use the meat for roasts, steaks, jerky or ground venison.
“I start from the back of the animal and work my way forward, all the way up to the neck,” he said. “I save that neck roast for slow cooking to break down the connective tissue and make it really tender. Of course, it depends on your needs. Later in the season, after you’ve got some steaks and roasts set aside, you may focus on grinding the whole thing, so you have plenty of ground meat for the year.”
Grider removes all the venison fat, which can cause the meat to have a gamey taste. Instead, he heads to a butcher shop or grocery store and procures beef or pork fat to mix with the venison for grinding. He tries to get the ratio of venison to fat to around 85-15 or 80-20.
“You can call the day before you plan to grind the meat and ask them to set aside 10 to 15 pounds of fat,” he said. “Venison is so lean, you need to put in a little fat. I’ve seen people use bacon ends, or you can buy a chuck roast and grind that in.”
If your hunt ends in a difficult recovery, Grider says hunting conditions will dictate whether the meat is salvageable.
“If the temperature is above 45 degrees, which is pretty common for most of the hunting season in Alabama, and the deer is out in the field for 6, 8, or 12 hours, be cautious about that end product,” he said. “Bacteria grows so fast. Rancid meat has a distinct odor and color. Use your eyes and nose to make the best judgment.”
When the hunt goes well, and the deer is processed correctly, it’s time to dine on some delicious wild game. One of Grider’s favorite preparations is venison burger, and he depends on the Maillard reaction to help him serve the best dish. The Maillard reaction is a chemical reaction that occurs when browning meat. After that reaction has occurred, the meat won’t stick to the cooking surface.
“When I’m cooking burgers or Korean beef on a grill or cast iron, I’m cooking it so that it gets a crisp, nice brown edge to it,” he said. “That’s the Maillard reaction, and it gives it a better taste. I see people browning meat, and they put it in the pan long enough for it to turn brown. If they leave it in just a little longer and continue to stir it, it gets a nice crispy edge from the Maillard reaction and the breakdown of the sugars. It changes the flavor profile for the better.
“A good way to check on the grill is if you try to flip the burger and it’s stuck to the grill, the Maillard reaction hasn’t happened. If you wait a little longer, it will unstick from the grill, and you can flip it easily.”
Grider said the worst mistake consumers of venison can make is to overcook it. If you’re not going the slow and low route with plenty of liquid, don’t go past medium rare.
“If you cook venison burgers hot and fast on the grill or flattop about 2 minutes on each side, that will leave you with a medium rare burger, which, in my opinion, is the best,” he said. “With a backstrap or inner loins, and you grill it hot and fast, you get a really crispy, tasty outside with a medium rare center. If you cook a burger or loin too long, it gets dry and tough. A well-done venison burger is not palatable.
“If you’re cooking shanks or neck roast, you want to cook it long and slow and keep it in some type of braising liquid.”
When it comes to waterfowl, Grider uses the same techniques that he does for venison, with one exception. He does not trim the fat on waterfowl.
“The only thing is I may go even a little rarer on waterfowl,” he said. “A lot of people just cut the breast out, and you can be missing a great opportunity with the skin and fat. If you’re lucky enough to harvest a duck with a good layer of fat, like early-season teal or wood ducks in a cypress brake, you leave the skin on and add a ton of flavor. You can also pluck the duck and cook the thigh and leg meat, which is delicious.”
Even with small game, Grider prefers to age the meat before he prepares it. He removes the entrails from small game and waterfowl and ages them in the refrigerator.
“Not to say you can’t cook it right out of the woods, but I find that if you age it to break down the protein, it makes for really tasty wild game,” he said.
Shore lunch completes every Canadian fishing adventure.
Canadian guide and foodie Kent Kulrich shares his secret shore lunch recipe.
The visual presentation of this wilderness feast is surpassed only by its unbeatable aroma, texture, and taste.
By Dr. Jason A. Halfen
Waves lapping against the rocks, a crackling fire, and a delicious handcrafted meal of fresh fish, fried potatoes, and warm beans fuel the body and fill the soul. This is angling comfort food at its finest – and like most of you, I could enjoy this meal every day and twice on Sundays. However, everyone should be willing to step away from the typical midday fare and embrace a little variety on an extended trip north of the border.
I met Canadian guide and foodie Kent Kulrich on a recent trip to northwest Saskatchewan’s beautiful Tazin Lake Lodge, a destination renowned for its huge lake trout and enormous northern pike. My group connected with Kent and his guests for lunch on one afternoon, and I was utterly blown away by the meal presented to me on a granite knoll overlooking gorgeous Tazin Lake. This was a baked lake trout feast like none I had ever encountered – and now, you’ll be able to enjoy it too.
“Fried fish, spuds, and beans are great,” reflects Kulrich, “but we like to offer our guests something a little different if they’re in the mood.” While anglers flock to Tazin Lake Lodge to tangle with multiple 40-inch class lake trout during their visit, northwest Saskatchewan’s Tazin Lake is also brimming with eater-size lakers – fish in the three to five-pound class. Tazin Lake Lodge’s staff of professional and experienced guides take advantage of this bounty, perfecting several trout recipes that elevate the shore lunch experience to entirely new levels. Below, you’ll find Kent Kulrich’s recipe for baked lake trout with a sweet chili sauce, paired with maple-glazed red potatoes and seasoned veggies.
Author Dr. Jason A. Halfen is a long-time guide, tournament angler, and specialist in marine electronics who owns and operates The Technological Angler. He is holding an eater-size lake trout.
Begin with an eater-size lake trout. We caught these in abundance in relatively shallow water at Tazin Lake – and by shallow, I mean anywhere from one to twenty feet deep. Ever seen a 20-inch lake trout swimming in six inches of water along a sandy beach? Or caught a laker on a topwater less than a yard from shore? If not, add those to your list of things to do while visiting Tazin Lake Lodge. Gut the trout, remove the head and tail, and then slice through the skin and part-way into the meat along every inch along the trout’s length. A Regal River 7-Inch Straight Fillet Knife from Smith’s Consumer Products is the right tool for this job. Those slices ensure that the fish cooks evenly, allowing flavors to penetrate throughout.
Begin seasoning the trout by rubbing salt and lemon pepper into the cuts along the sides of the body. Add a generous amount of sweet chili sauce, lime juice, and fresh parsley. Wrap the seasoned trout in parchment paper – which keeps the fish moist as it cooks and prevents sticking – and encase it within a double layer of aluminum foil. Place the package on top of hot wood coals and bake for about 15-minutes, flipping once as the trout cooks.
A Regal River 7-Inch Straight Fillet Knife from Smith’s Consumer Products is the right tool for this job.
With the fish baking on the coals, turn your attention to the sides. Slice red potatoes into chunks, fry them in a cast-iron pan with a bit of oil until done, and then glaze them with maple syrup – because, after all, this is Canada, eh? A blend of seasoned salt and smoked paprika finishes these wilderness spuds and pleases the most discerning palette. While the potatoes cook, open cans of corn and mushrooms and simmer them in water, right in their original cans. When the veggies are heated, drain the water and add diced fresh garlic, rosemary, and parsley before combining the corn and mushrooms into a delicious blend that perfectly complements the other components of this Saskatchewan feast.
The visual presentation of this wilderness feast is surpassed only by its unbeatable aroma, texture, and taste.
When timed correctly, the sweet chili-baked trout, maple syrup-glazed potatoes, and seasoned corn and mushrooms should be ready at just about the same time. Open the trout’s foil package into the shape of a large bowl, then add the spuds and veggies alongside the baked guest of honor. The visual presentation of this wilderness feast is surpassed only by its unbeatable aroma, texture, and taste. It’s hard to return to fried fish after a meal like this!
Shore lunch is an integral part of every Canadian fishing experience. On your next visit to Saskatchewan’s outstanding Tazin Lake Lodge, be sure to grab an eater-size lake trout right before lunch and give this baked trout recipe a whirl. You’ll be thrilled that you did.
NOTE: Images courtesy of Dan Amundson, Kent Kulrich, and Dr. Jason A. Halfen
About Dr. Jason A. Halfen: A long-time guide, tournament angler, and specialist in marine electronics who owns and operates The Technological Angler, which teaches anglers to leverage modern technology to find and catch more fish. Learn more by visitingThe Technological Angler on Facebook or @technoangler on Instagram.
About Smith Products:We are constantly striving to identify improved methods for providing consumers with the best edge, as shown by our recent launch of an electric sharpener incorporating interlocking diamond-coated wheels that ensure a factory-sharp edge to your knife with only a few quick passes of the knife. We also offer designs appropriate for the field or your gourmet kitchen. We have the broadest line of knife and scissors sharpeners available, ranging from simple, fixed-angle pull-through sharpeners for consumers that want quick and easy sharpening to sophisticated Precision Kits designed for the knife sharpening enthusiast. Our offering includes both manual and electrical sharpeners that incorporate many different abrasive materials, including diamond, carbide, ceramic, bonded synthetic abrasives and, of course, natural Arkansas stones.
My grandson and I tried something new in the smoker getting ready for a Sunday family dinner celebration. Chicken drumsticks! A few weeks back, we found some huge chicken drumsticks at a local market in Arcadia, Florida. When we bought them, we vacuum-packed 13 of them for later use – that day was last weekend. It took about 3 hours to bring them up from freezer temp to room temp, then we seasoned them up in two groups. This was a first-time family taste experiment with chicken drumsticks, HUGE drumsticks. For reference on size, these 13 drumsticks weighed nearly 4.5 pounds!
The first group of 6 was prepared with a spice mix blended together in a small bowl:
2 Tbs garlic powder
2 Tbs black pepper
2 Tbs dried Cuban oregano (homegrown)
2 Tbs chili powder
Then rub coat each drumstick with olive oil
Then sprinkle coat with the spice mix.
The second group of 7 used a blended spice mix quite different from the first group:
1 Tbs garlic powder
2 Tbs smoky dry rub
2 Tbs paprika
2 Tbs ground sage
2 Tbs onion powder
1 tsp salt
1 tsp black pepper
2 Tbs chili powder
Then coat each drumstick with yellow mustard
Then sprinkle coat with this spice mix.
It didn’t take long to fire up the smoker with mesquite wood chips, 275F. It took 2 hours to reach 170F internal on the whopper chicken legs.
In between, after 90 minutes, we flipped them over and brush-coated all of them with ½ cup of liquid chili sauce mix from Aldi’s that was thinned with ¼ cup of Bragg’s apple cider vinegar.
Then we smoked the coated drumsticks at the same temperature for another 30 minutes to harden and crisp up the skin.
In the future, we plan to try the same recipe in the oven and then again in the instant pot with the same formula.
We’ll be looking for taste vs time to do, but honestly, it will be tough to beat the real smoker cooking taste.
These smoker drumsticks were absolutely delicious! Just plain delicious! Worth the time (total = 3 hrs).
In a non-metal container, prepare the Hi Mountain Seasonings Game Bird and Poultry Brine following the instructions included in the brine kit. Place the turkey breast into the brine and refrigerate for 24 hours.
Remove the turkey breast from the brine and dry thoroughly with paper towels.
Set your smoker or pellet grill to 180 degrees.
Lightly coat all sides of the turkey breast with olive oil and apply a liberal amount of Hi Mountain Seasonings Rib Rub.
Smoke the turkey breast until the internal temperature reaches 165 degrees, making sure to turn the turkey breast once doing the smoking process.
Remove the turkey breast from the smoker and let rest for at least 15 minutes before slicing and serving.
Note: Use ameat thermometer to make sure the internal cooking temperature has reached 165F.
Just how fresh is the fish in the grocery store? I know one place, maybe more than one, where they are very fresh!
By Larry Whiteley
Have you been to the grocery store lately? I went with my wife the other day and was totally shocked. Usually, I don’t pay much attention to what she spends on groceries. Since it was just the two of us, I always figured it couldn’t cost too much. The grocery cart was not anywhere near full, and it was almost $200. It would have been a lot more, but they were out of some of the things she needed.
I thank the good lord for my morning coffee each day.
We would have also spent even more money than we did if I had been willing to pay $14 for a small bottle of pancake syrup that I used to like when it cost $8, or $12 for a box of granola bars I always took hunting and fishing with me when they cost $7. Those are only a few examples. Meat prices had gone up more than anything. The only thing I was looking for that had not increased in price was my favorite Guatemalan coffee beans that I grind myself and enjoy every morning. They had plenty of it, so I bought a bag, and I didn’t even need it. I told my wife to buy a bag or two every time she went grocery shopping as long as the price remained the same, and before they didn’t have any of it on the shelves anymore. She is more than willing to do that because she knows how cranky I get when I don’t have my coffee.
On the way home from the grocery store, I already had my coffee, but I was cranky anyway because of our grocery shopping experience. She just rolled her eyes and humored me as I went on about Washington politicians, government waste, supposed shortages, price gouging, disruptions in the global supply chain, adverse weather, rising fuel and energy prices, and a few other things I said about certain politicians that aren’t printable. I don’t know how some families make it. I don’t know how my wife made it listening to me go on about everything all the way home. I think she was glad we didn’t have to stop and get gas because that would have really set me off.
Since there weren’t that many groceries, it didn’t take very long for me to bring them into the house. I offered to help put them up, but she declined my help and told me to go cool off for a while. Well, that’s not exactly what she said but what she did say is not printable here either. I have a feeling she won’t want me to go grocery shopping with her again. I am also betting I will never know what she spends to feed us again. That is probably a good thing.
I went to my man cave, and she was glad I did. I was glad I did, too, because I was here, surrounded by my deer, duck, pheasant, turkey and fish mounts, that a brilliant idea came to me. To save my wife and me a lot of money, I needed to go hunting and fishing more! That way, I would bring home more fish and game to put in our freezer to help offset the cost of groceries. My kind of grocery shopping would be done outdoors in nature, rather than in a building surrounded by crowds of people pushing carts around and spending too much money.
A little more shopping in the woods and streams might just reduce our grocery bills, whaddya think?
I am retired and have accumulated a vast amount of the outdoor gear I would need. I reasoned that there really wouldn’t be much cost to do this kind of grocery shopping. The only cost would be a license and tags, plus gas to get where I was going. I could even stay out several days doing grocery shopping. My wife would really like that. I could just take my tent along and camp where I didn’t have to pay a fee. That would save on gas too.
As for food, I could bring the deer jerky and summer sausage I make for snacking. I could fry up fish from the freezer or some of what I caught for my meals. Grilling a deer steak would be really good too. I could also fry up potatoes since they aren’t costly. I could even boil up a pot of my Guatemalan coffee over a campfire. Isn’t this idea sounding good?
For my grocery shopping, I should be able to tag two deer and two turkey hunting. The turkeys won’t give us much meat, but they will be good in soups or cooked in my smoker or deep fryer. The deer I would skin and process myself to save money. It would mostly be made into venison burgers since my wife likes those. I enjoy the steaks, jerky and summer sausage. I like deer heart too. She definitely will not eat that.
As for more grocery shopping, there are ducks during the open season, and I should be able to bring home plenty. Maybe I can develop a good recipe for baked duck and wild rice she would like. I forgot about dove season. I might get her to try a grilled bacon-wrapped dove. Did I mention that I have to cook all the wild game at home because my wife won’t? That’s just another reason she will like this idea.
Smoked venison is among our favorite ways to enjoy the delicious wild bounty of Mother Nature.
She likes to eat fish, so she will definitely approve of grocery shopping via fishing. This is where the meat could really pile up in the freezer and save us money. If I can catch my limit of several fish species every day while shopping, can you imagine how many fish I would have in the freezer even if I make sure I don’t go over my possession limits? I can fry them, bake them, grill them, can them, and smoke them. I can also go grabbing and gigging for sucker fish. I love fried suckers, and so does my wife.
When the frogging season is open, I could go fishing during the day and get a limit of frogs at night. I love frog legs. I could even catch crawdads and boil them up. They say fried snake tastes like chicken, so I might even try that too. I don’t think I will be able to get her to try any of that. While I’m doing all my grocery shopping out there, I can also gather wild mushrooms, berries and nuts. I’m telling you, my idea of grocery shopping could really work.
In the little time I would be home and not out grocery shopping, I would care for our garden. We would also have a good supply of tomatoes, cucumbers, and other vegetables to go along with the fish and game and everything I bring home from my grocery shopping. This idea of mine is sounding better and better. Now all I need to do is convince my wife how much money I can save us with my kind of grocery shopping. Wish me luck on that.
Cooking our harvest, even easier to get “best taste” with these secret seasonings…I’m sharing ’em
Even my college grandkids like to cook with the “make me look good” ingredients
Imagine yourself biting into this!
By Larry Whiteley
Spring is here and that means it’s time to get outside, fire up your backyard grill or smoker and enjoy outdoor cooking. Whether it’s beef, pork, chicken or wild game, you want the very best flavor you can possibly have from the meat you grill or smoke. Here are some products that come highly recommend by the Whiteley family that will have your family and friends thinking you are a gourmet chef.
I use the Hi Mountain Seasonings full line of rubs, marinades, seasonings and sauces that turn whatever I’m grilling outside – or cooking in the kitchen – into a master piece. Hi Mountain has been in business for 28 years and is based in Riverton, Wyoming surrounded by the beautiful Rocky Mountains. They make high quality packaged jerky, meat processing products, seasonings and more for hunters, game processors and home chefs like me who enjoy grilling or smoking.
My grandson’s delicious venison fajitas
Hi Mountain makes seasonings for wild game, steaks, burgers and even fish, as well as other specialty seasonings, sauces and marinades. I have used their line of jerky, snack sticks and sausage kits on the venison I have harvested for years. My kids, grandkids and friends are all glad I do because they get to enjoy my work. Little do they know how easy it is for me with these “help-me” products. If time is a factor for you, Hi Mountain also now has their own delicious packaged jerky you can buy if you don’t want to make your own.
The wild turkey breast, pheasant and waterfowl I am lucky enough to harvest while hunting all get soaked in their brine mix before smoking, grilling or baking. You cannot believe how tender and flavorful it makes it. Like most of you, I love fried fish, but I also started using their fish brine mix. You won’t believe how good baked, grilled or smoked fish is using this product.
My son’s grilled bacon wrapped tenderloin filets
My son Daron loves grilling venison burgers and steaks on his Green Egg Grill using either the Zesty Western, Hickory, Buffalo Wing, Fiesta Salsa or Garlic Pepper burger seasonings. His favorite for grilling bacon wrapped filets is their Western Style steak rub. He also uses their rubs for brisket, prime rib, poultry, ribs and fish.
Even my grandkids, who share a house while they are away at college, are into using Hi Mountain products when they cook. My grandson’s favorite is using venison steaks to make delicious fajitas or their brine mix for grilled duck breast. My granddaughter likes their dip and dressing mixes too. You know kids, they never fib.
Go to www.himtnjerky.com to check out their great line-up of products and accessories. You can also click on their store locator tab to find a retailer near you that carries their products.
I could go on and on about Hi Mountain’s great products, but I’ve made myself hungry, so I am going to go fire up the grill. I’m thinking maybe grilled walleye and grilled venison tenderloins sounds pretty good. I really like this stuff.
Like Coffee? Get Camping Much? You Might Need This.
Portable TOUGH Coffee Maker that Takes Any K-Cup.
My Search is Over!
The family firepit – camping with OXX, the aroma and taste of fresh coffee to honor those sacred moments we share among dancing flames.
By Larry Whiteley
A recent Harvard School of Public Health study showed 54% of Americans drink coffee and you can count me into that percentage.
I enjoy my coffee as I sit at my desk in the early morning hours writing articles and piloting radio shows. It helps keep my mind clear as I craft the words I need to write.
A thermos of coffee warms my hands while sitting in a treestand waiting for a deer to come by my hiding place or in a blind waiting to hear a booming gobble as the sun starts peeking over the hills.
Steam rises from my coffee as I sit in the boat, in the darkness, listening to the water lapping against the sides and watching the colorful morning sunrise reflecting in the water.
Ready to travel with OXX for my hot coffee.
I sip coffee as I sit around the campfire by myself in the morning darkness, watching the flames dance, and listening to owl’s talking to each other.
I have always made my coffee at home and took it with me in a thermos or insulated mug on my outdoor adventures. Sometimes I just stop by the local convenience store, but they don’t always have the flavor of coffee I like. Besides, according to the same Harvard study I mentioned earlier, the average price for a brewed cup of coffee is a $1.38 and I’m kind of a frugal guy, but my wife says a better word is “cheap”.
I knew I couldn’t take my single-cup coffee maker with the fancy name “out there” because it would have broken in no time with water and coffee all over everything.
So, I have been searching for a coffee maker that I could take with me on fishing, hunting and camping trips where I was staying in an RV, cabin, lodge or motel. It’s been a long search for years, as I enjoy making my own coffee instead of the usual watered-down variety you get in some places.
Workhorse coffee pods, I’m a dark and bold guy.
In my search, I found out that most public and private campgrounds across America now have campsites with electrical hook-ups. So I can brew my favorite coffee even when I’m camping out if I could just find the right coffee maker.
To be able to travel with it, I knew I wanted it to be like the old saying goes “strong as an ox,” as well as impact-resistant, durable, spill-proof and portable, and if it had its own travel bag that would hold everything needed, that would be nice too. I also wanted to be able to use it on my kitchen cabinet at home or take it out to my workshop when I wanted. Ask for the sky! Why not?
During my continued search, I was surprised to come across a coffee maker called “OXX,” just like the saying, but with an extra “X”. I then did more research and found that in the wagon-based settlement of the American West before the railroad, a team of oxen were preferred over horses to plow fields, bust sod, remove boulders, stumps and other heavy tasks because they were stronger and tougher than horses.
The OXX COFFEEBOXX was designed for construction workers who needed something strong and tough enough to make coffee on their wild jobsites. A lot of construction workers also enjoy all the outdoors has to offer and they soon discovered, since it was tough enough for work, they could also use it for all their outdoor adventures. AND, it was everything I was searching for.
The OXX travel bag carries everything you need.
They also offer single cup “Workhorse Coffee” which is very good. I like the “Dark & Bold,” but I have tried the “All Day Smooth” and the “2X Caffeine,” and I like them too. But if you still have to have your own brand, any coffee pod will work in the OXX and they even have reusable pods for your favorite ground coffee.
Now if someone would just come up with a small, reasonably priced, portable power unit I could plug my OXX COFFEEBOXX in and brew my favorite cup of coffee when I am completely off the grid and deep in the wilderness, I would be one happy man.
Go to www.oxx.com and check out the “strong as an ox” OXX COFFEEBOXX.


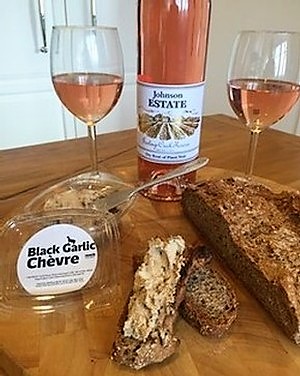


 For my family, it’s our ultimate outdoor eating solution integrated into one package that easily fits into a backpack too. At under 4 pounds and a wonderful 9 by 9 by 6 compact size, the kids can go on side treks and weight and size are not a factor. I could not believe it either.


 Not sure what to get that special someone for Valentines Day? The answer is at your finger tips. Just type


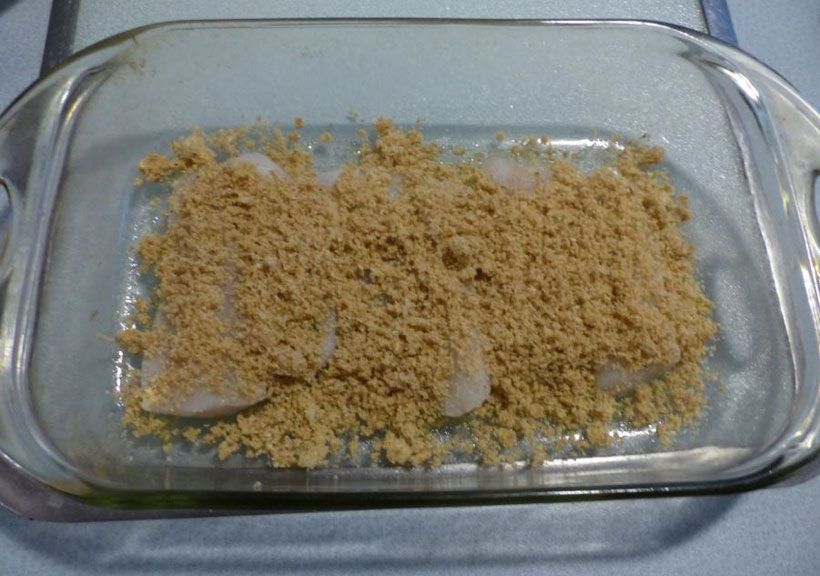


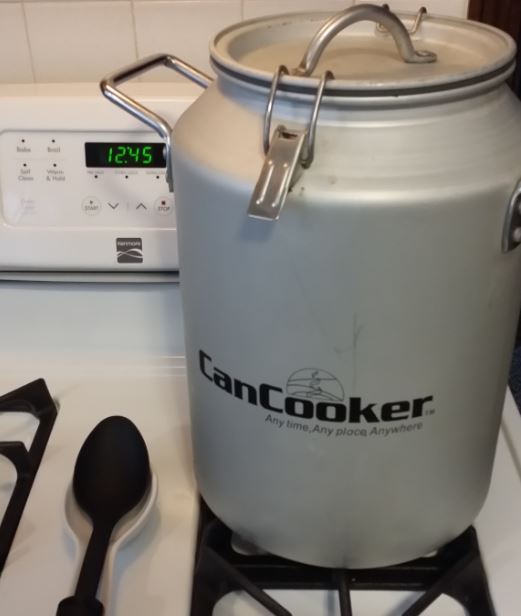
 By Fern Fisher
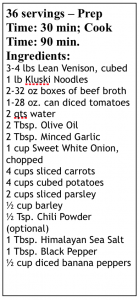 Directions:


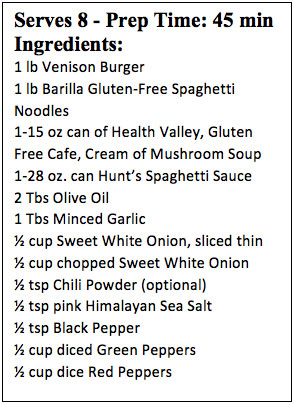 With so many folks changing to a more healthy diet, many to a gluten-free diet due to Lyme disease, Celiac disease or for other health concerns, we have this delicious spaghetti recipe in our house at least once every week or two. The Barilla Spaghetti Noodle (pasta) is made with corn and rice, contains no GMO ingredients and is certified Gluten Free. As the noodles are the base for this recipe, the great taste and texture of this brand is excellent for all of your favorite pasta dishes, especially when you combine it with the tasty venison burger. The bread you see is gluten-free baker’s bread that is available at a local health bakery near Orchard Park, New York.
 Add the Spaghetti Sauce and gluten-free Mushroom Soup to the large pot and gently stir. Turn the stove burner to simmer level. Add salt and pepper to your preference, Chile powder and hot sauce, as desired. Let simmer for about 30 minutes. The flavor exchange and the mix of ingredients with noodles taste so good.


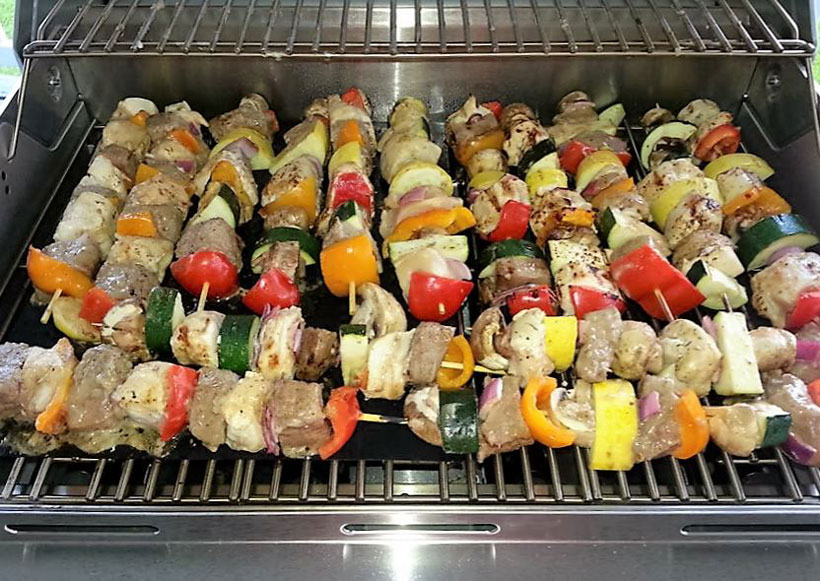
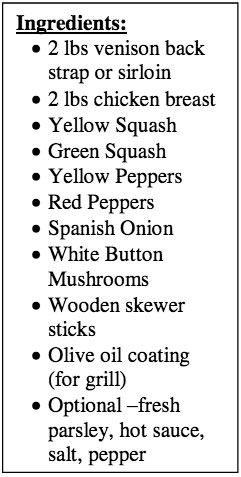 First, rinse off the meat, then cut your venison back-strap or venison sirloin into cubes of about 1” x 1” size. Cut-off any excess fat, as venison fat tastes bitter and tart.
 Bragg’s Organic Marinade Information: The Bragg’s Ginger & Sesame Dressing and Marinade is based on the delicious flavor of their famous Bragg Liquid Aminos. Ginger and Sesame seeds are blended into the smooth, zesty dressing, then combined with Bragg Organic Apple Cider Vinegar, Bragg Organic Extra Virgin Olive Oil, Bragg Liquid Aminos, organic honey, organic lemon juice, organic garlic, organic ginger, organic sesame seeds, and natural xanthan gum. Besides bringing salads to life, it can be used to spice up Chinese stir-fry, chicken, or grilled vegetables. This sweet and tangy taste brings you another dressing with the best of the Bragg tradition of eating and living. GLUTEN FREE • NON-GMO


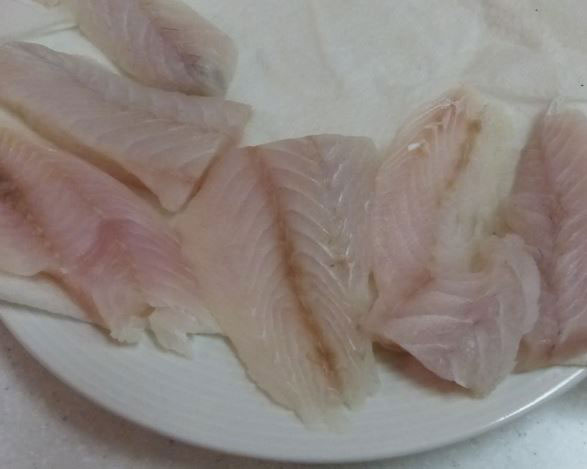


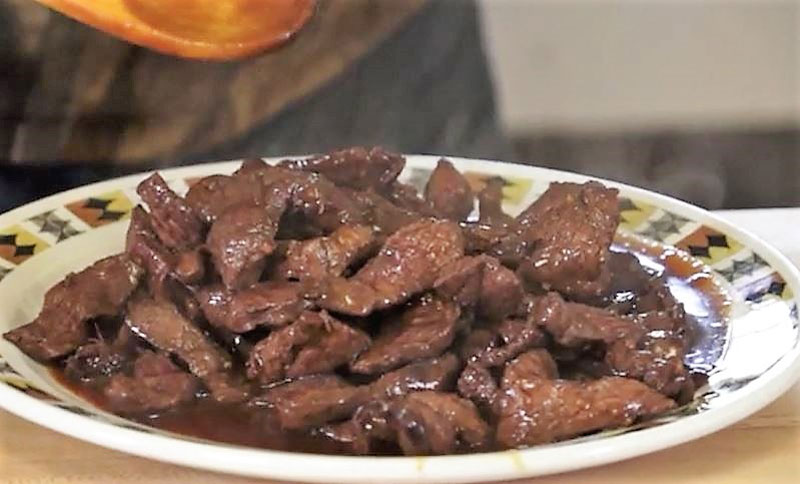


 Coat the smoker rack with olive oil and place the bear meat in the smoker/pellet grill. During the smoking process, use a kitchen brush to glaze the roast with maple syrup on the exposed sides of the roast. Smoke it until the internal temperature of the roast hits 160F. Use a digital thermometer.


 The second group of 7 used a blended spice mix quite different from the first group:


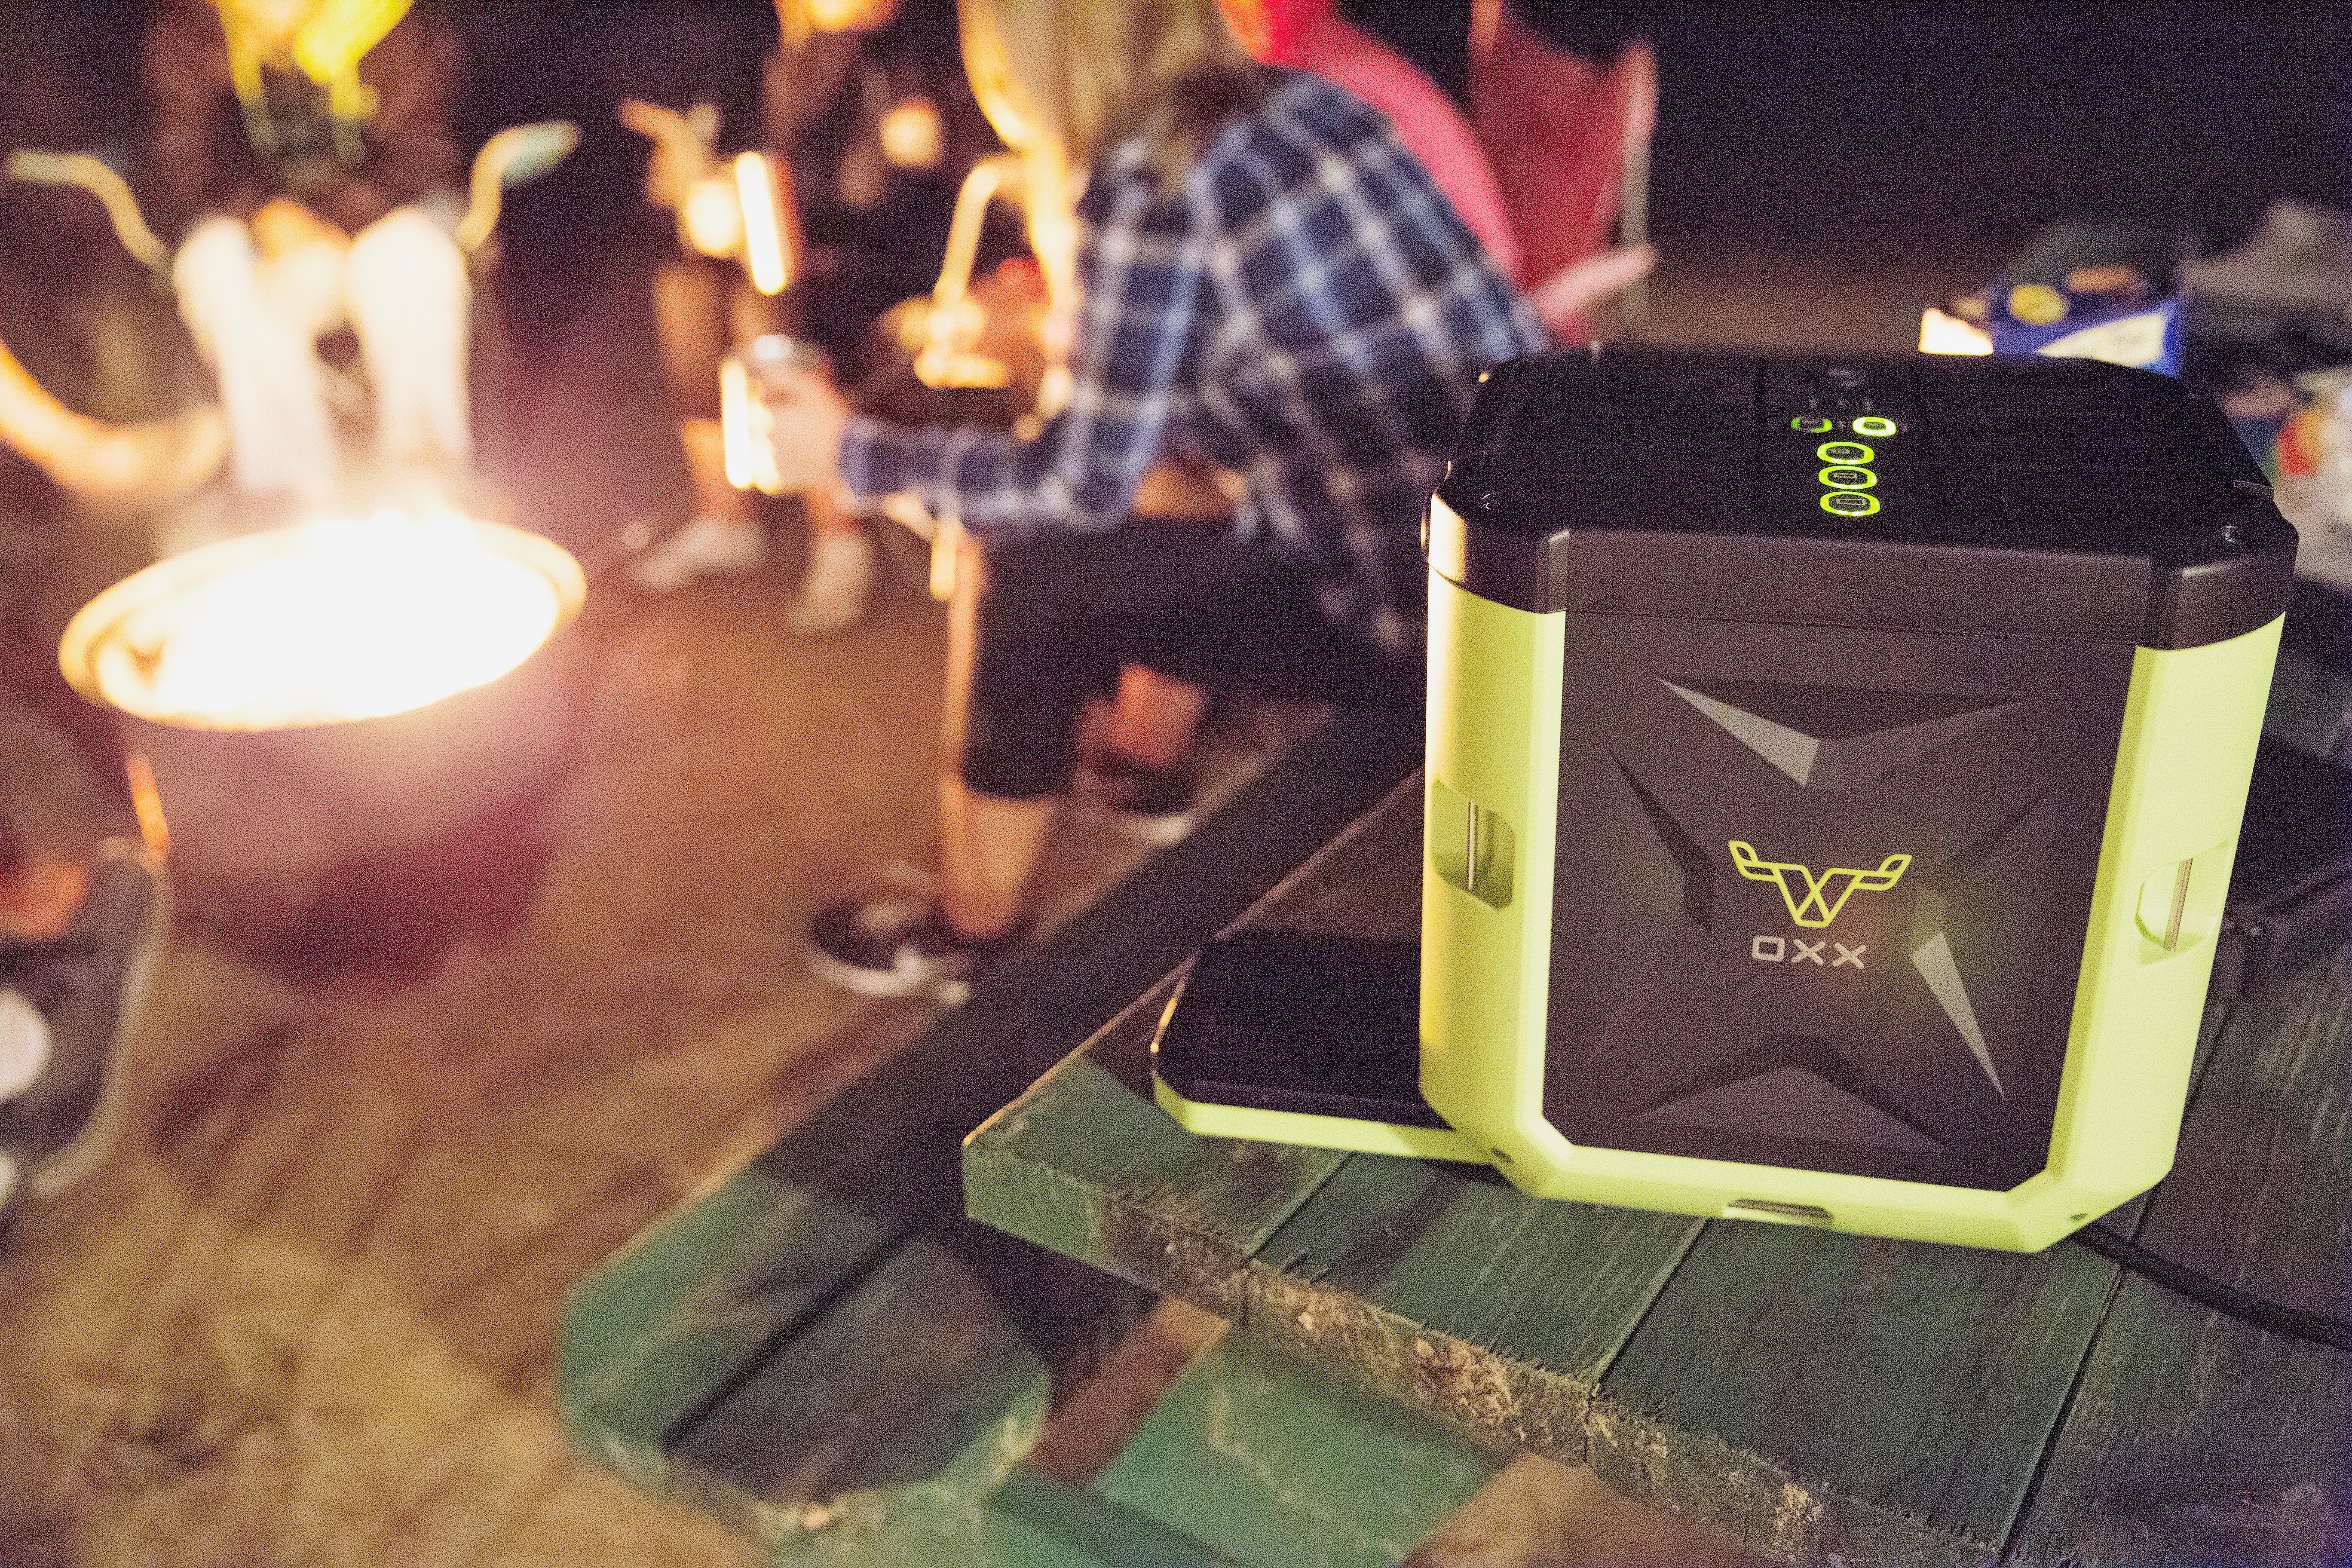


Duck Breast Roasted Vegetables
2-4 duck breasts, skin and fat removed
blackening seasoning
1 tsp olive oil
2 TBS Orange marmalade
1/4 cup orange juice
1 TBS butter, chilled
Vegetables
Baby carrots, peeled cut in half
Small beets, peeled, cut in quarters
2 bell peppers, cut into quarters
Freshly ground black peppercorns
1 tsp (5ml) chopped fresh thyme
Kosher salt
Olive oil
Fried carrot strips for garnish
Pea shoots for garnish, optional
Cut and prepare all of the vegetables, toss in oil and seasoning and place on a parchment lined pan, preheat oven to 400 degrees F.
The vegetables will take between 30-45 minutes, cook duck to be ready at the same time.
Remove duck from fridge, place on paper towel to absorb excess moisture.
It is best to use a Teflon pan for cooking the duck, place on medium-high heat, add a small amount of olive oil. Season
the duck with Kosher salt and black pepper, sear on both sides till golden brown, add orange juice then the marmalade. Simmer duck in juice on low for about 5-7 minutes for larger breasts, 2-3 for smaller, internal temperature should be around 130 degrees F.
When finished, remove from pan, place on a plate to rest. In the meantime, check seasoning and doneness for the vegetables in oven, when finished place on serving tray.
Rest duck for 10 minutes, in the meantime, reduce liquid by half, swirl butter in at last moment.Slice the duck thinly and place on top of the vegetables, pour remaining sauce over top as well. Indulge!